General section
5.3.4 UI Settings
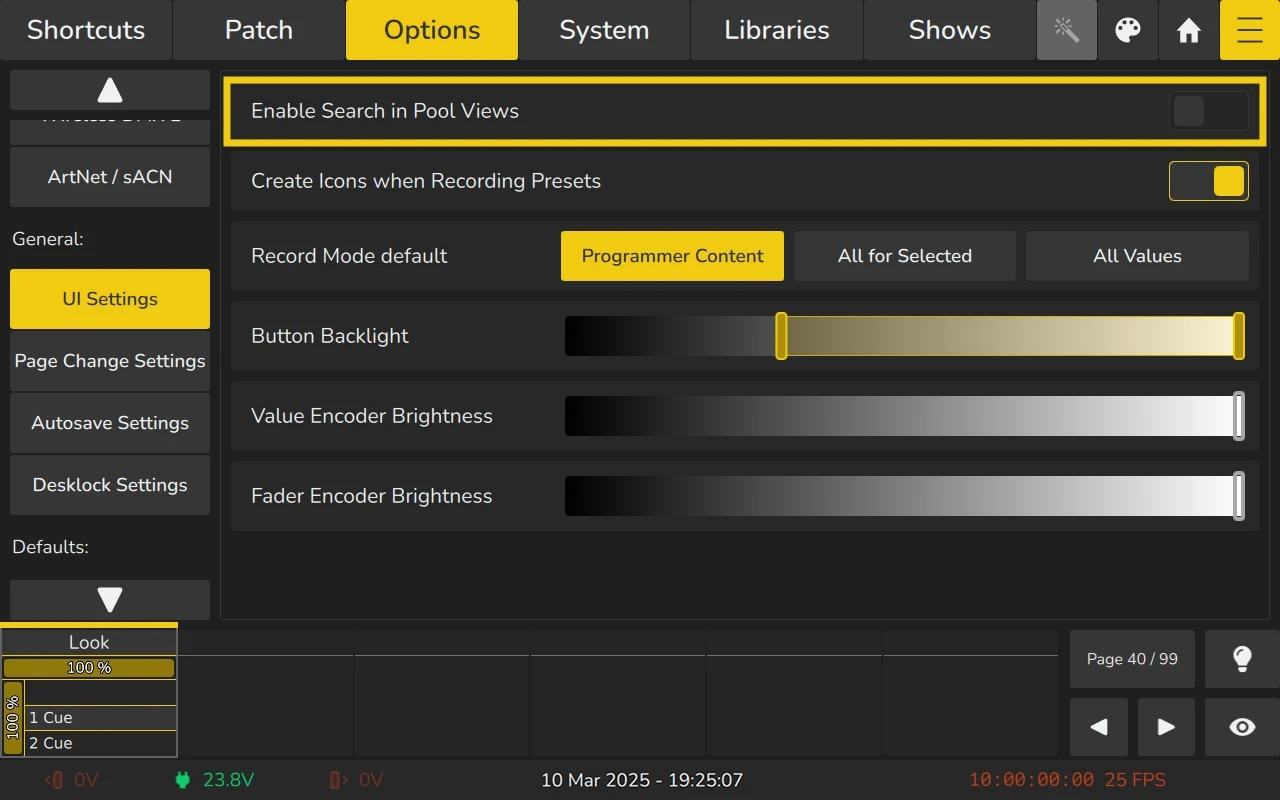
Enable Search in Pool Views
The console allows users to enable or disable the search feature within pool views such as the Fixtures View, Groups View, Presets View, and Fader Page. When enabled, a search toolbar appears above the respective pool view, allowing for streamlined searching and filtering of items.
To enable or disable the search feature, follow these steps:
- Open the Menu by clicking the Menu
 button in the top toolbar.
 - Navigate to the Options Tab.
- Locate the UI Settings button.
- Toggle the Enable Search in Pool Views option to enable or disable the search functionality.
- Once enabled, the search toolbar will be visible above pool views.
This feature enhances navigation and makes managing pool views easier by providing quick filtering options.
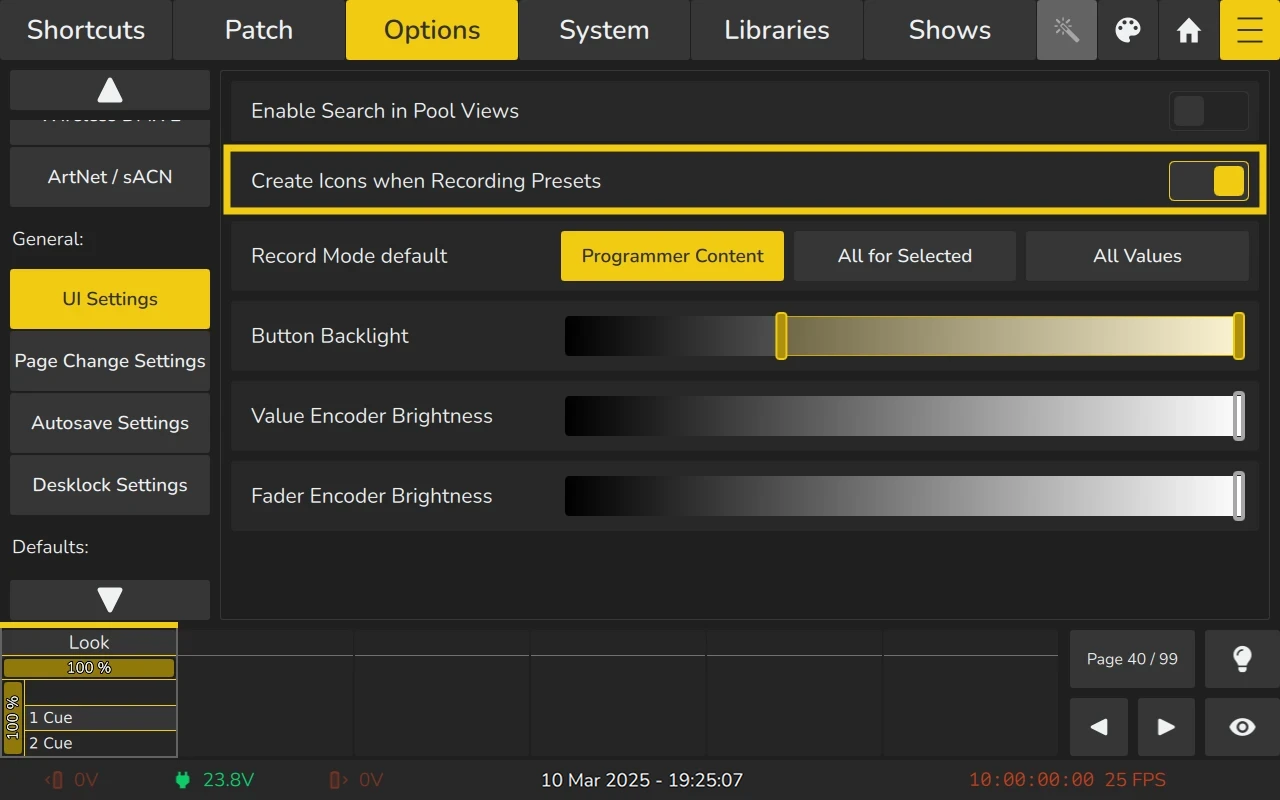
Create Icons when recording Presets
To enable or disable the automatic creation of icons when recording presets in EDGE, follow these steps:
- Open the Menu by clicking the Menu button in the top toolbar.
- Navigate to the Options Tab.
- On the left side of the Options Tab, select the UI Settings page.
- Locate the Create Icons when Recording Presets setting.
- Toggle the On-Screen switch to enable or disable the feature.
When enabled, EDGE will automatically generate preset icons using the last fixture in the selection. The icon creation considers elements such as color mixing and color/gobo wheels, though only one gobo wheel is supported during this process.
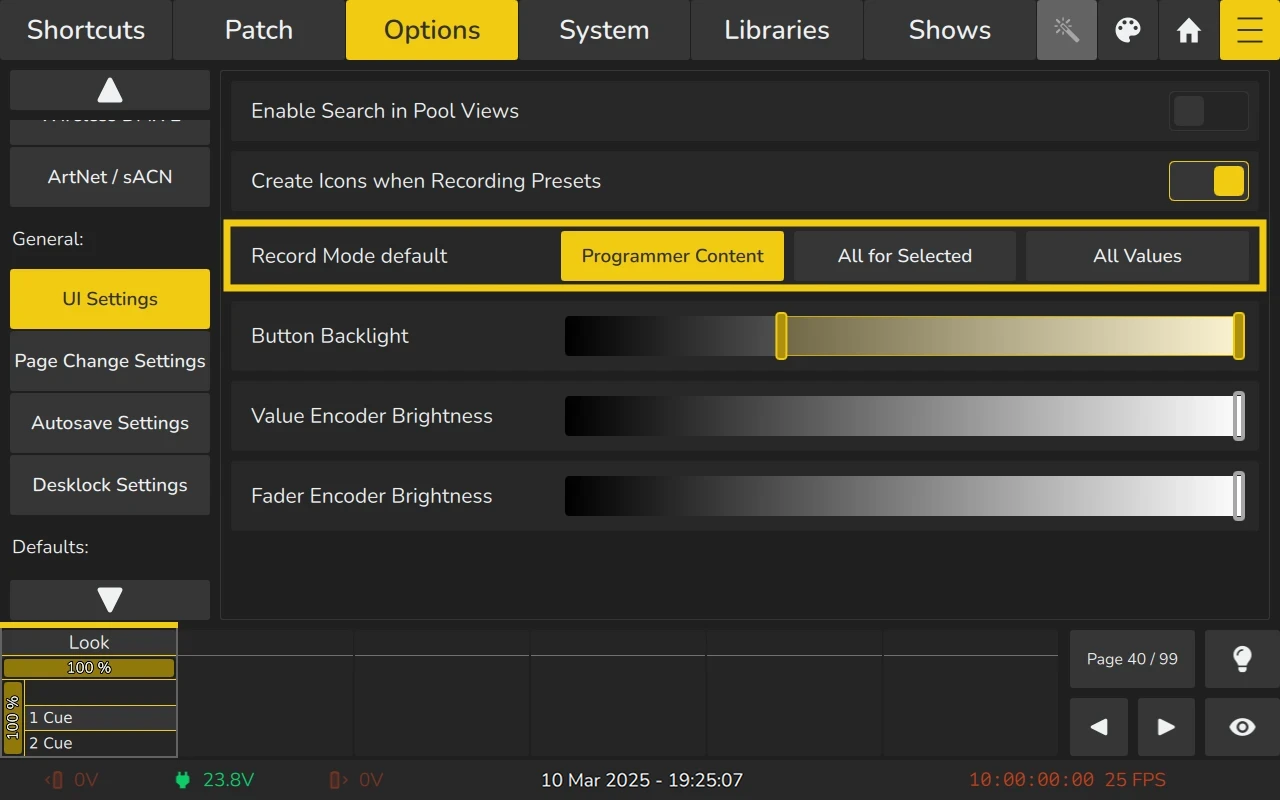
Record Mode defaults
Using the default Record Mode in EDGE, you can define how the console handles values when recording.
When recording, you may also click on the Command in the statusbar to change this value for this record action.
The available options include:
| Button | Function |
|---|---|
| Programmer Content | Records only the changes or adjustments currently touched in the programmer. |
| All for Selected | Records all parameter values of the currently selected fixtures, regardless of whether they were adjusted in the programmer. |
| All Values | Records all parameter values of all patched fixtures in the console, irrespective of selection. |
To set the default record mode:
- Open the Menu by clicking the Menu button in the top toolbar.
- Navigate to the Options Tab.
- On the left side of the Options Tab, select the UI Settings page.
- Use the buttons to select the desired default Record Mode:
- Programmer Content
- All for Selected
- All Values
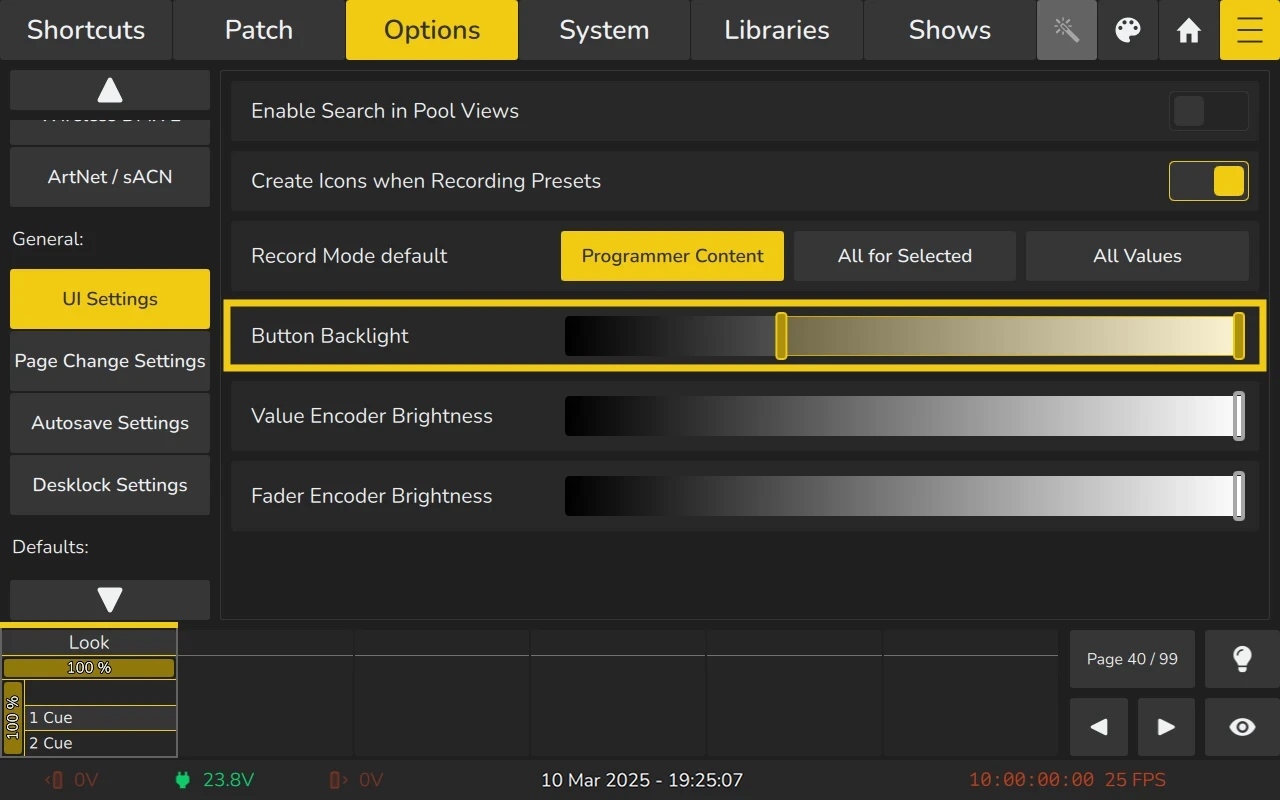
Button Backlight
To adjust the Button Backlight and Highlight brightness in EDGE:
- Open the Menu by clicking the Menu button in the top toolbar.
- Navigate to the Options Tab.
- On the left side of the Options Tab, select the UI Settings page.
- Locate the Button Backlight Slider. This slider has two handles:
- First Handle: Adjusts the brightness of the backlight (the standard illumination of the button when idle).
- Second Handle: Adjusts the brightness of the highlight (the illumination when the button is pressed).
Adjust both handles to your preferred levels to achieve the desired brightness for backlight and highlight states. Exit the menu or confirm your settings to apply the changes.
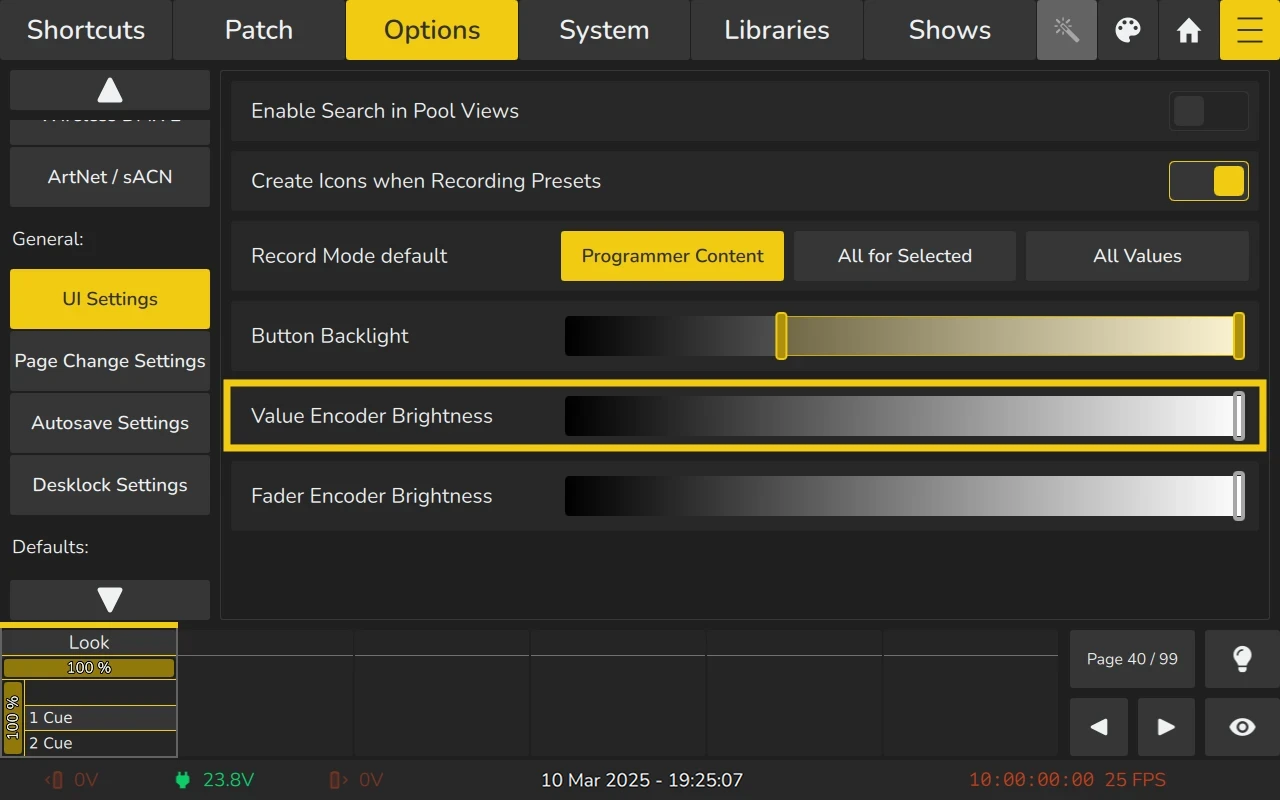
Value Encoder Brightness
To adjust the Value Encoder Brightness in EDGE:
- Open the Menu by clicking the Menu button in the top toolbar.
- Navigate to the Options Tab.
- On the left side of the Options Tab, select the UI Settings page.
- Locate the Value Encoder Brightness Slider.
- Adjust the slider to set the desired brightness for the value encoders located on the left and right of the screen. The changes will be applied immediately as you adjust the slider.
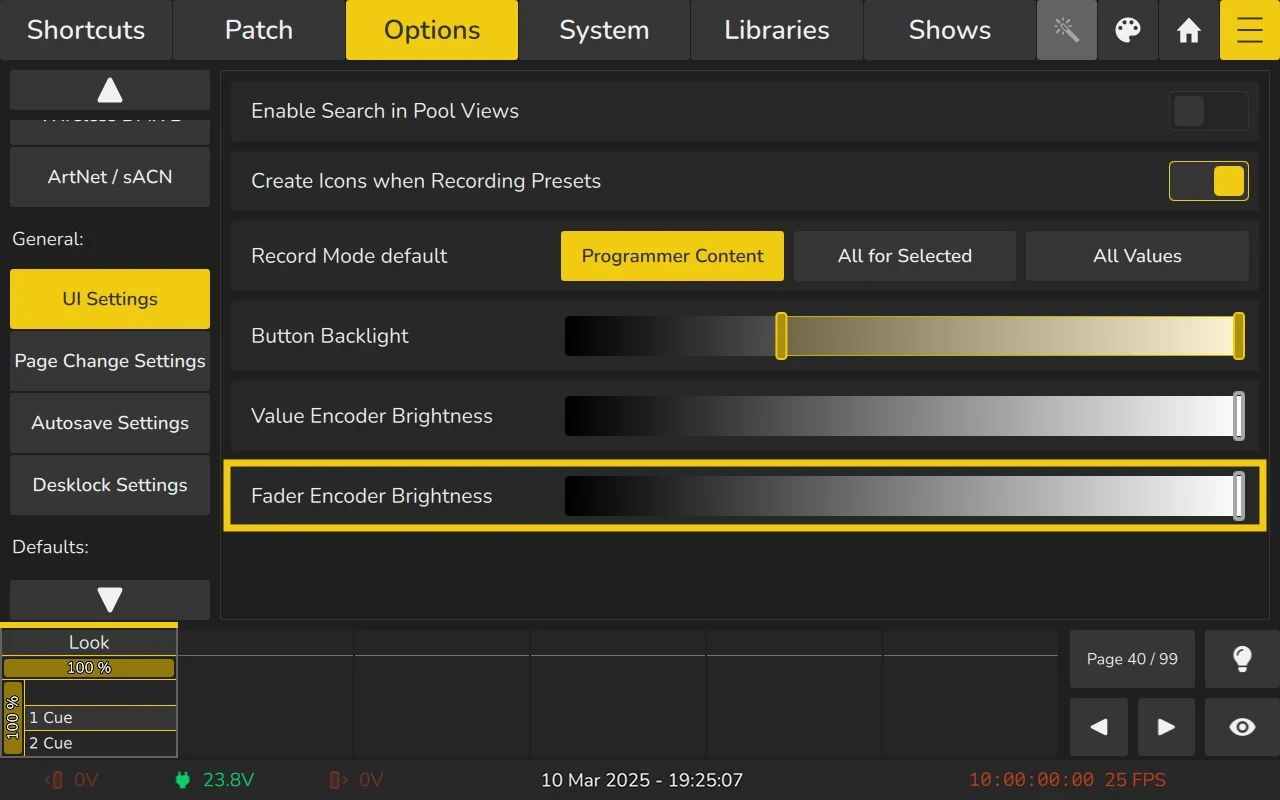
Fader Encoder brightness
To adjust the brightness of the Fader Encoders (located above the faders and below the screen) in EDGE:
- Open the Menu by clicking the Menu button in the top toolbar.
- Navigate to the Options Tab.
- On the left side of the Options Tab, select the UI Settings page.
- Locate the Fader Encoder Brightness Slider.
- Adjust the on-screen slider to set the desired brightness level for the fader encoders.
The changes will take effect immediately as you adjust the slider.
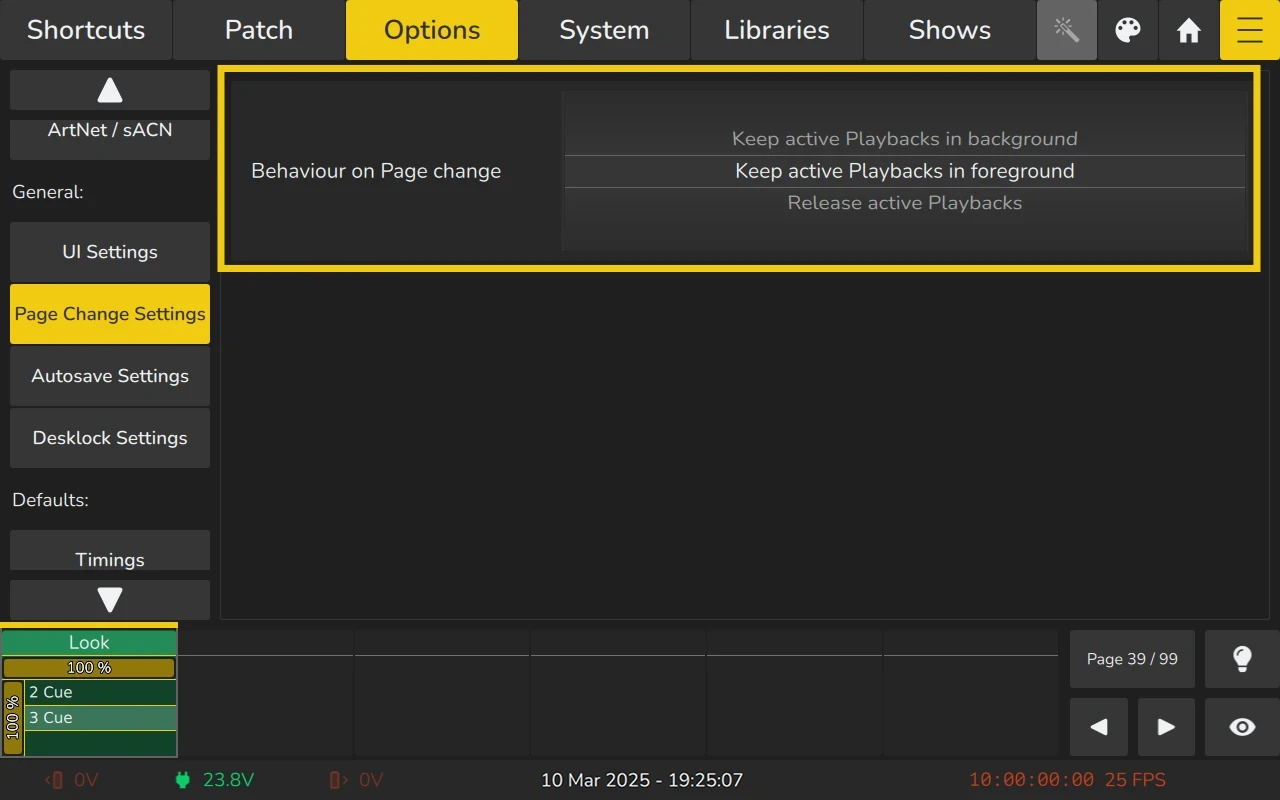
5.3.5 Page Change Settings
Behavior on page change
| Button | Function |
|---|---|
| Keep active Playbacks in Background | When this option is selected the playbacks will be kept running “in the background”. They will not be visible on the fader labels, and the encoder, fader and buttons will control the playbacks on the current page. |
| Keep active Playbacks in foreground | When this option is selected the playbacks will be kept running “in the foreground”. Any playback on the current page will be overridden by the active playbacks from previous pages, until these are stopped. |
| Release on Page Change | With this entry selected, the console will automatically release all playbacks on the previous fader page when the active page is changed. Playbacks assigned to the template page will not be released. |
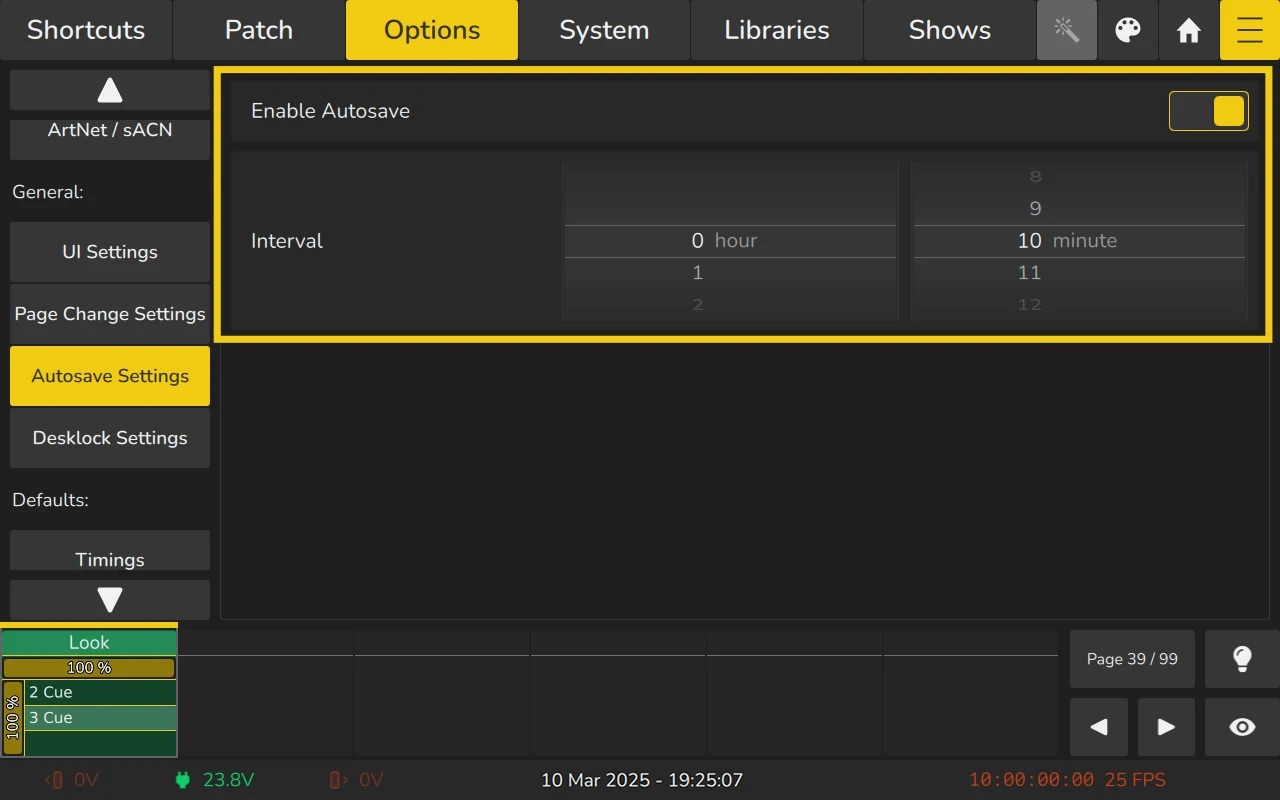
5.3.6 Autosave settings
By default, EDGE automatically saves your show file every 10 minutes. If desired, you may disable this autosave functionality and change the interval to automatically save your show.
If you would like to turn Autosave on/off or change the interval, please do as follows:
- Open the Menu by clicking the Menu button in the top toolbar.
- Navigate to the Options Tab.
- On the left side, select the Autosave Settings page.
- Toggle the On-Screen switch to either turn autosave on or off.
- If desired, change the interval time to execute the autosave function.
5.3.7 Desklock Settings
EDGE gives you the option to lock your desk and allow only authorized persons to access and unlock the console. It is also possible to set a password or a lock screen background image.
Since these settings are stored within the show file, you need to set it up for each show separately.
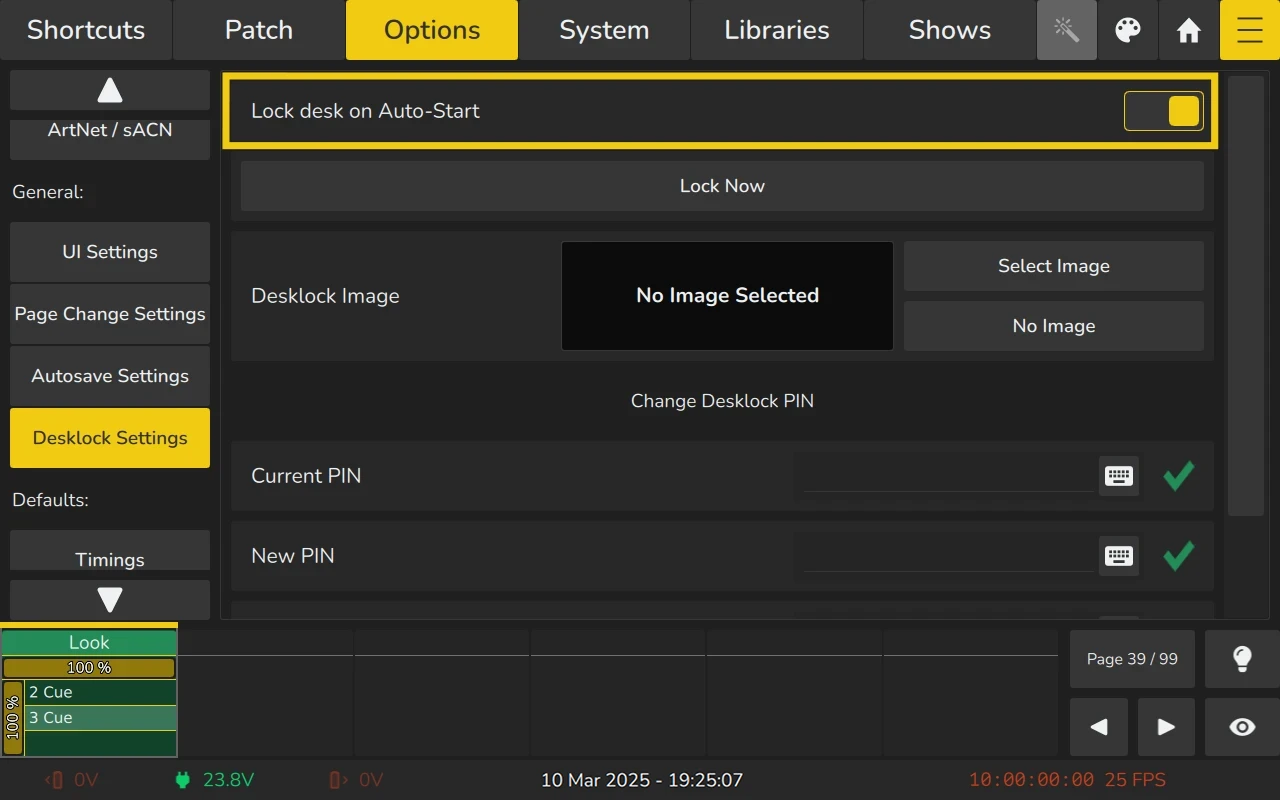
Automatically lock EDGE after booting
You can set EDGE to lock the desk automatically after it boots into the show file.
To enable this feature, please do as follows:
- Open the Menu by clicking the Menu button in the top toolbar.
- Navigate to the Options Tab.
- Go to the Desklock Settings page.
- Toggle the On-Screen switch to either turn Lock desk on Auto-Start on or off.
Locking the Edge Console
You lock Edge against undesired access by third parties using the desk lock functionality.
To lock the console, please do as follows:
- Open the Menu by clicking the Menu button in the top toolbar.
- Navigate to the Options Tab.
- Go to the Desklock Settings page.
- Click on the Lock Now Button to lock the console.
Alternatively, you may use the shortcut found on the right part of the Shortcuts Page.

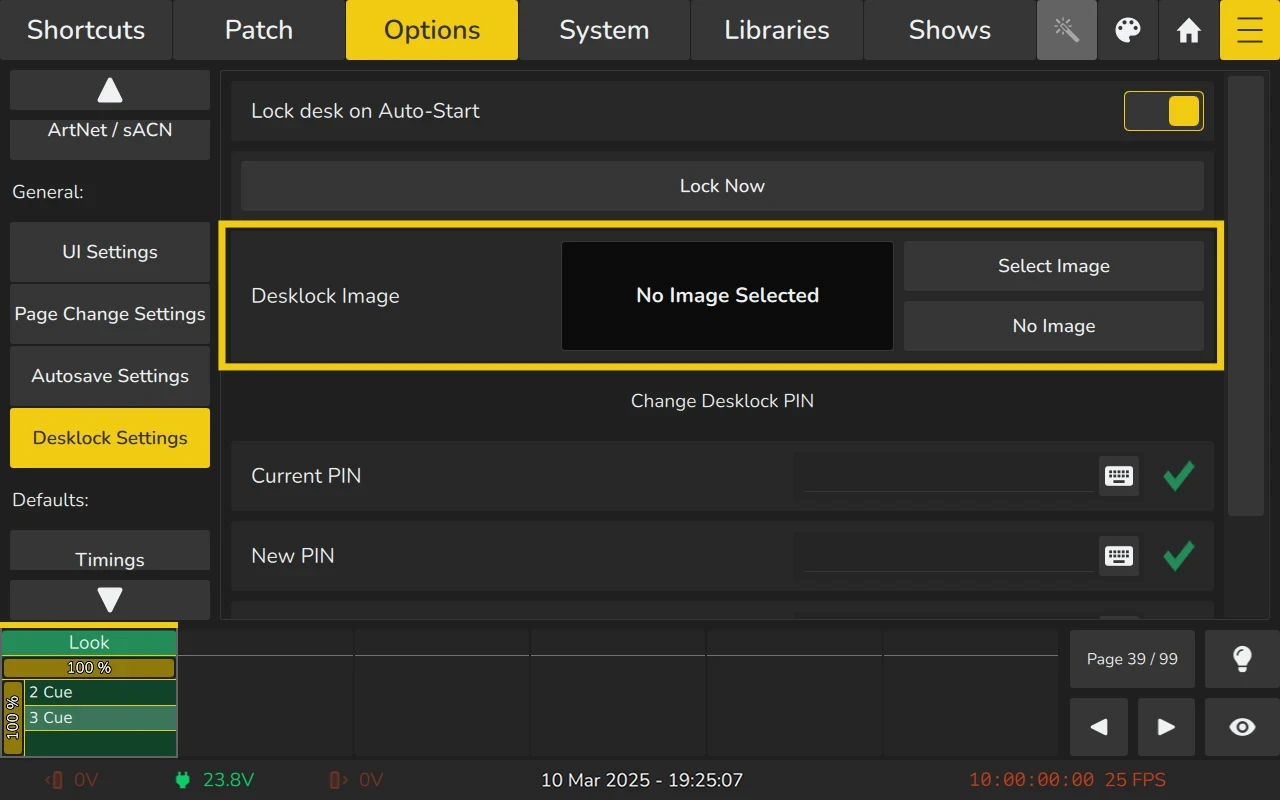
Set a background image for the lock screen
EDGE allows you to customize the lock screen by setting a background image for each show. To set a background image for the lock screen, follow these steps:
- Copy the
.jpegor.pngfile to theEDGE3/image_import_exportfolder on an USB Stick. - Open the Menu by clicking the Menu button in the top toolbar.
- Navigate to the Options Tab.
- Select Desklock Settings.
- Locate the Desklock Image section and tap the Select Image button to open the
Images in Showdialog. - Click on +Import to add images from USB files.
- A new dialog will open. Select the image file and click on Import.
- Once the image is added to the
Images in Showdialog, select it and click on Ok to confirm your selection.
The selected image will now appear as the lock screen background whenever EDGE is locked.
From the same Images in Show window you can also rename the images, replace them and delete them by using the buttons on the top part of the window. To learn more about images in show files go to Importing and Managing Images.
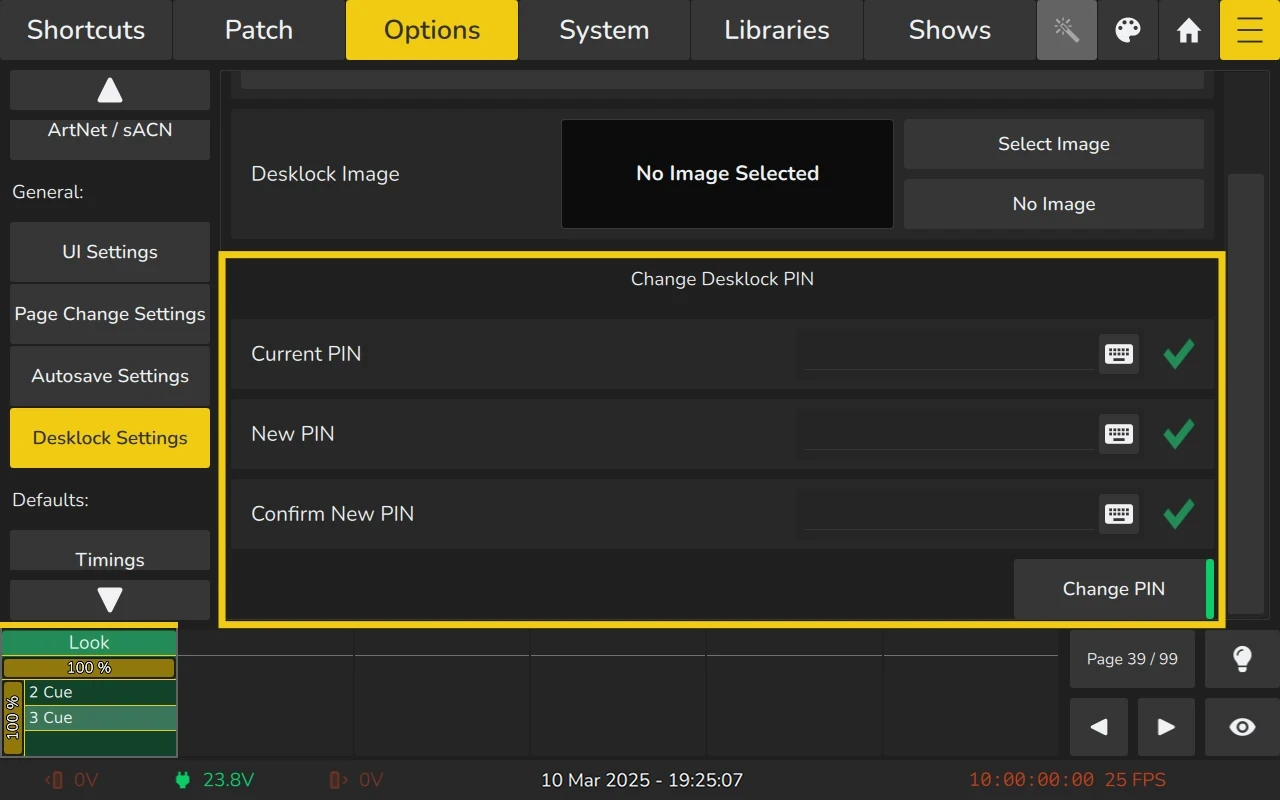
Change the Desklock Password
To change the desklock password, please do as follows:
- Open the Menu by clicking the Menu button in the top toolbar.
- Navigate to the Options Tab.
- Select Desklock Settings.
- Scroll down to the Change Desk lock Pin section.
- Enter your old PIN code into the Current PIN text field (only if you previously changed the PIN).
- Enter the new PIN in the New PIN and Confirm New PIN text-fields.
- Click on Change PIN.