5.4 System Settings Tab
The System Settings tab contains all system-wide configurations for the console. From this tab, you can adjust various settings, including:
- Power Preferences
- Keyboard Layout
- Date and Time
- Network Settings
- And more.
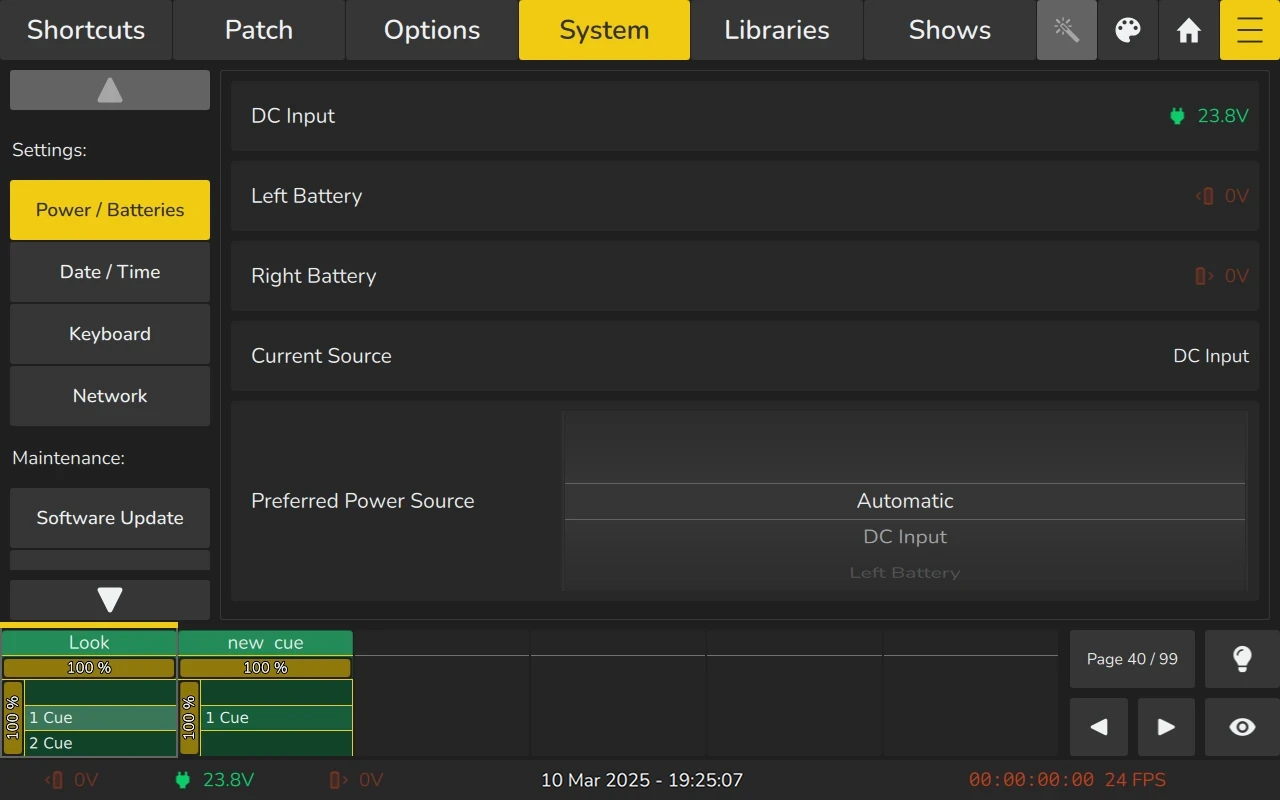
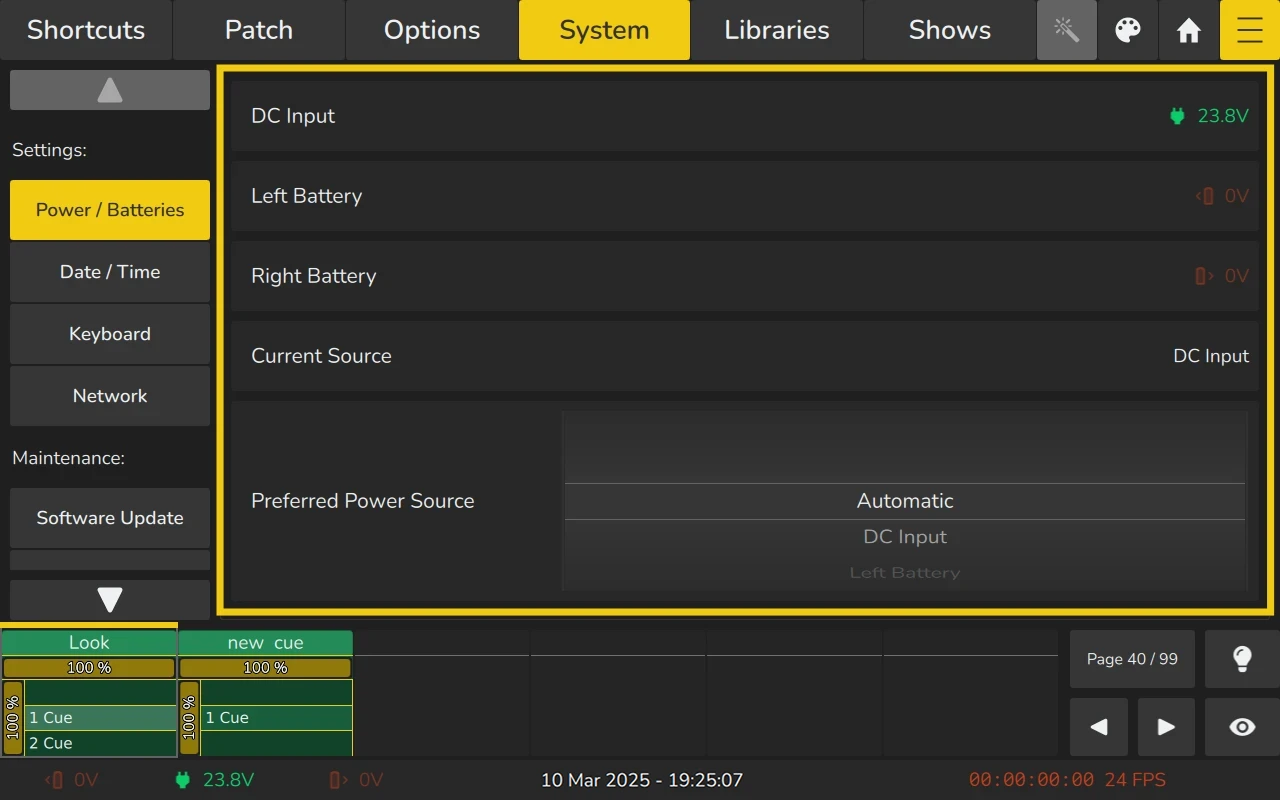
5.4.1 Power / Batteries
The EDGE console can be powered through a 4-Pin XLR connection (with 12 to 28V DC) or by using industry-standard V-Mount batteries with either 14.8V or 26V. These different battery types and external power can be mixed as needed. Edge does not charge the connected batteries.
The Power / Batteries Page within the System Tab provides an overview of the current voltages for each input and displays the active power source.
The voltages of each input are also displayed in the bottom toolbar. The color of the icons indicates if the voltage level is good (green), medium (orange) or bad (red).
The current source is indicated by a brighter icon.
When swapping batteries make sure the battery you are about to swap is not the current source. Even though hotswapping works, it is not recommended due to wear and tear on the V-Mount plates and supporting electronics.
Power Source Selection
- The user can select a preferred power source from the following options:
- Automatic (automatic selection based on available power)
- DC Input via the 4-Pin XLR
- Left Battery
- Right Battery
Low Voltage Warnings
- If any of the power sources experience low voltage, a warning screen will be displayed.
- If the voltage falls below a critical level, a dialog will appear, giving the user 15 seconds to connect a power source with sufficient voltage or charge.
- If no action is taken within 15 seconds, the console will automatically shut down to prevent damage.
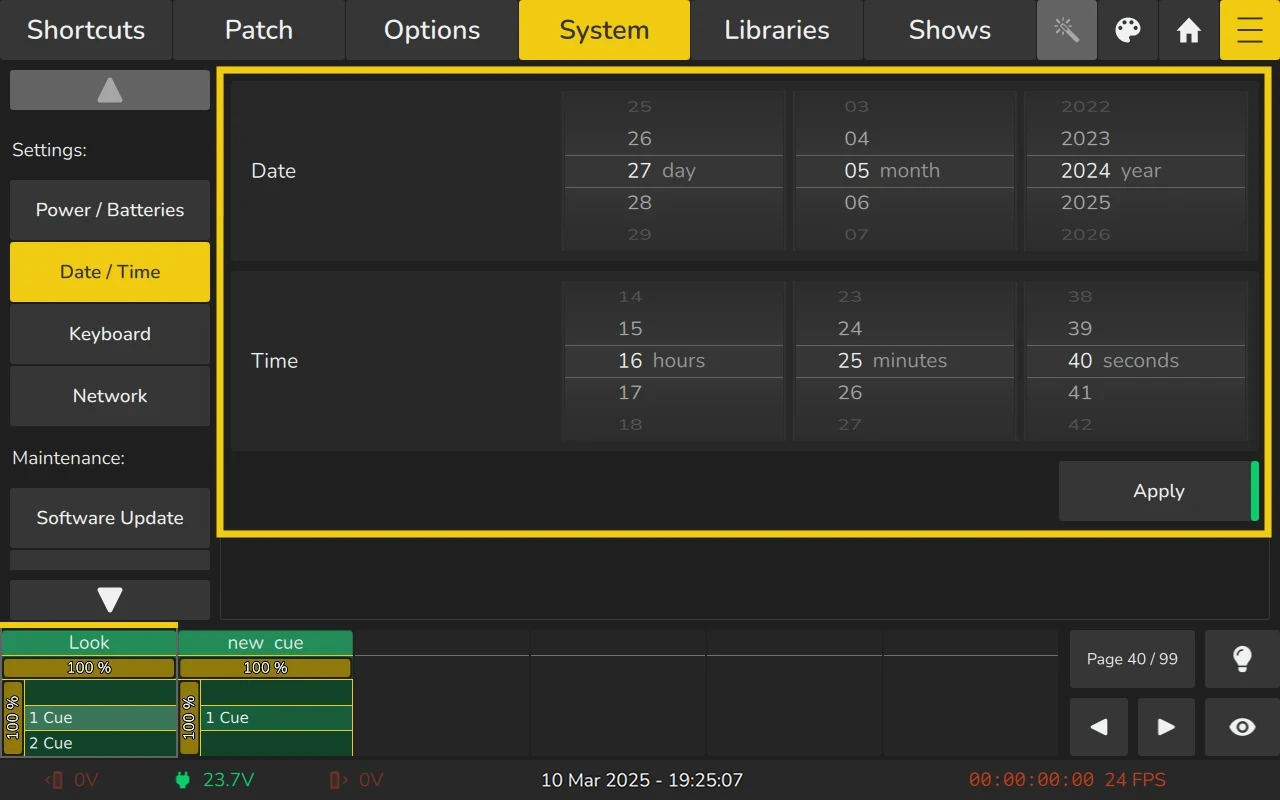
5.4.2 Date / Time
Please follow these steps to set the consoles Date and Time:
- Open the Menu by clicking the Menu
 button and change to the System tab.
 - Click on Date / Time
- Select the appropriate Date and Time.
- Click on Apply when done.
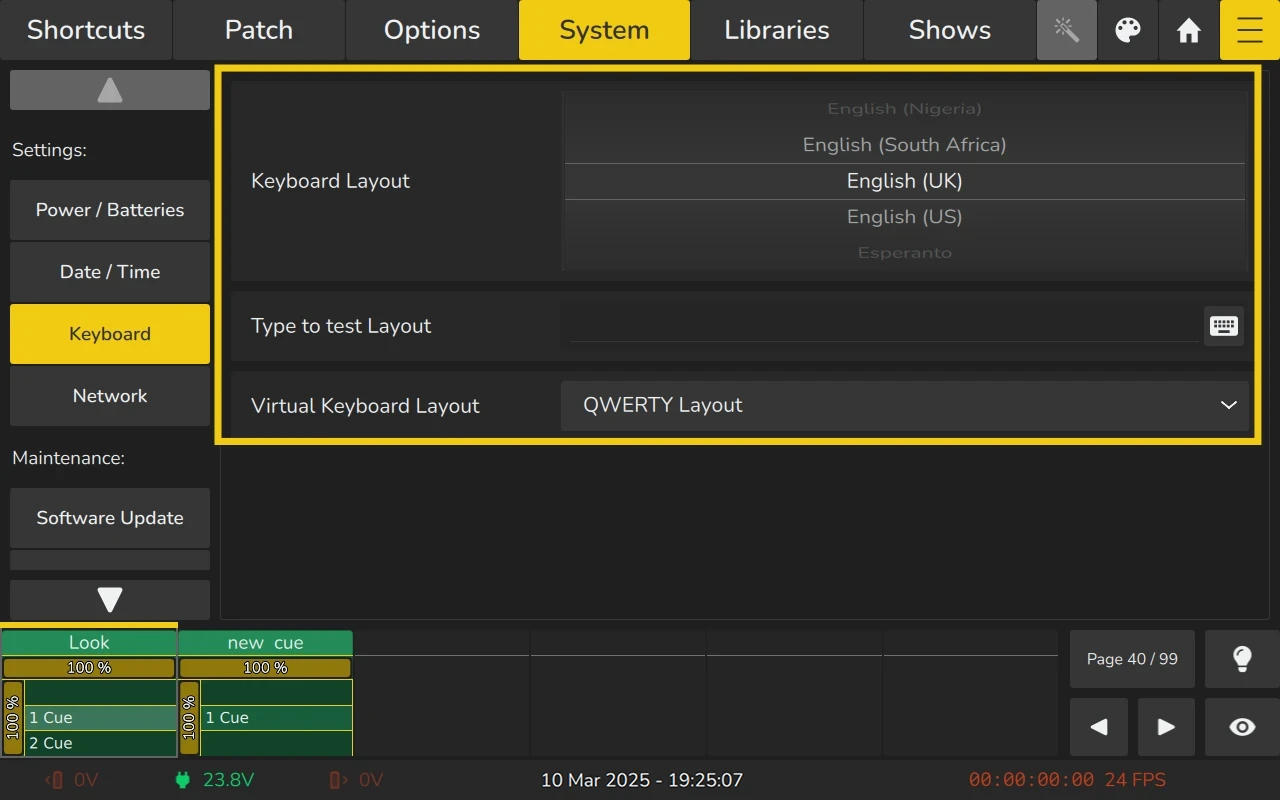
5.4.3 Keyboard Layout
EDGE offers the possibility to define the Keyboard Layout of the external USB Keyboard, and of the virtual keyboard.
Please follow these steps to do so:
- Open the Menu by clicking the Menu button and change to the System tab.
- Click on Keyboard.
- Select the appropriate Keyboard Layout from the List to change the USB keyboard layout.
- Select the desired Virtual Keyboard Layout from the drop-down menu.
- Type to test layout your changes on the text field.
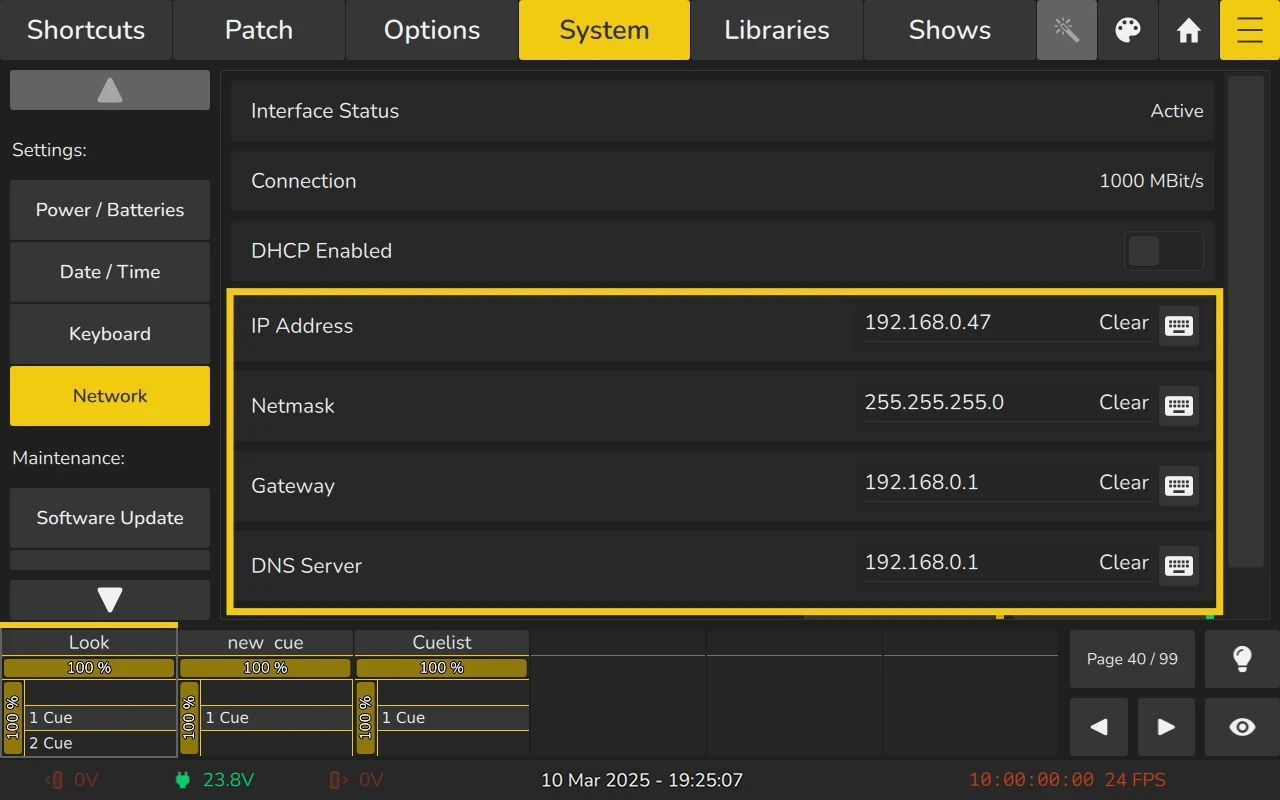
5.4.4 Network Settings
To view the console’s network interface status and make changes to the configuration, follow these steps:
- Open the Menu by clicking the Menu button and navigate to the System tab.
- Click on Network.
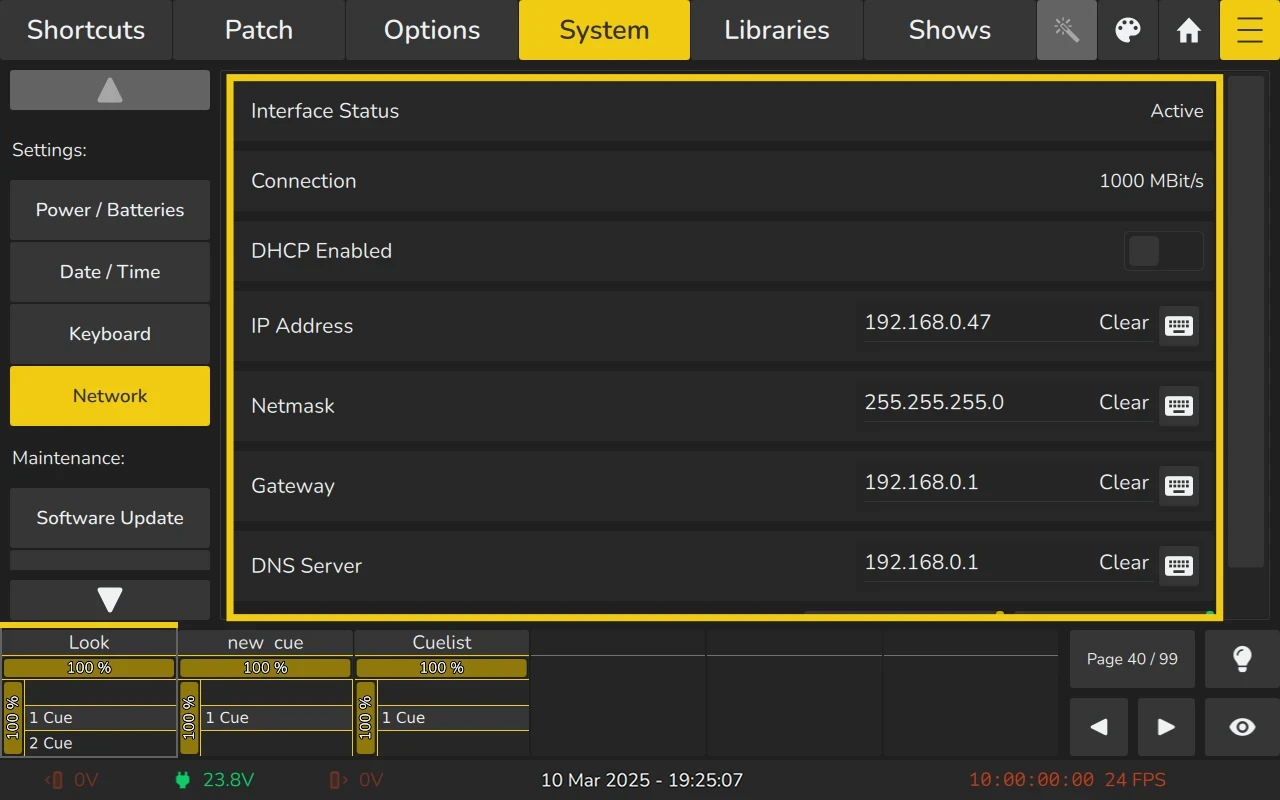
Dynamic Configuration (DHCP)
To configure the console to use a dynamic IP address through a DHCP Server (typically built into most routers or access points), follow these steps:
- Turn on the DHCP Enabled on-screen switch.
- Scroll down and click on the Apply Settings button.
This will allow the console to automatically obtain an IP address from the network's DHCP server.

Static Configuration
To configure a static IP address, follow these steps:
- Turn off the DHCP Enabled on-screen switch.
- Enter the IP Address and Subnet Mask in the corresponding text fields.
- (Optional) Enter the Gateway and DNS Server if you need internet access for features like online library or software updates.
- Scroll down and click on the Apply Settings button.
Reset Configuration to factory default
To reset settings factory defaults, scroll down and click on the Reset Settings button.
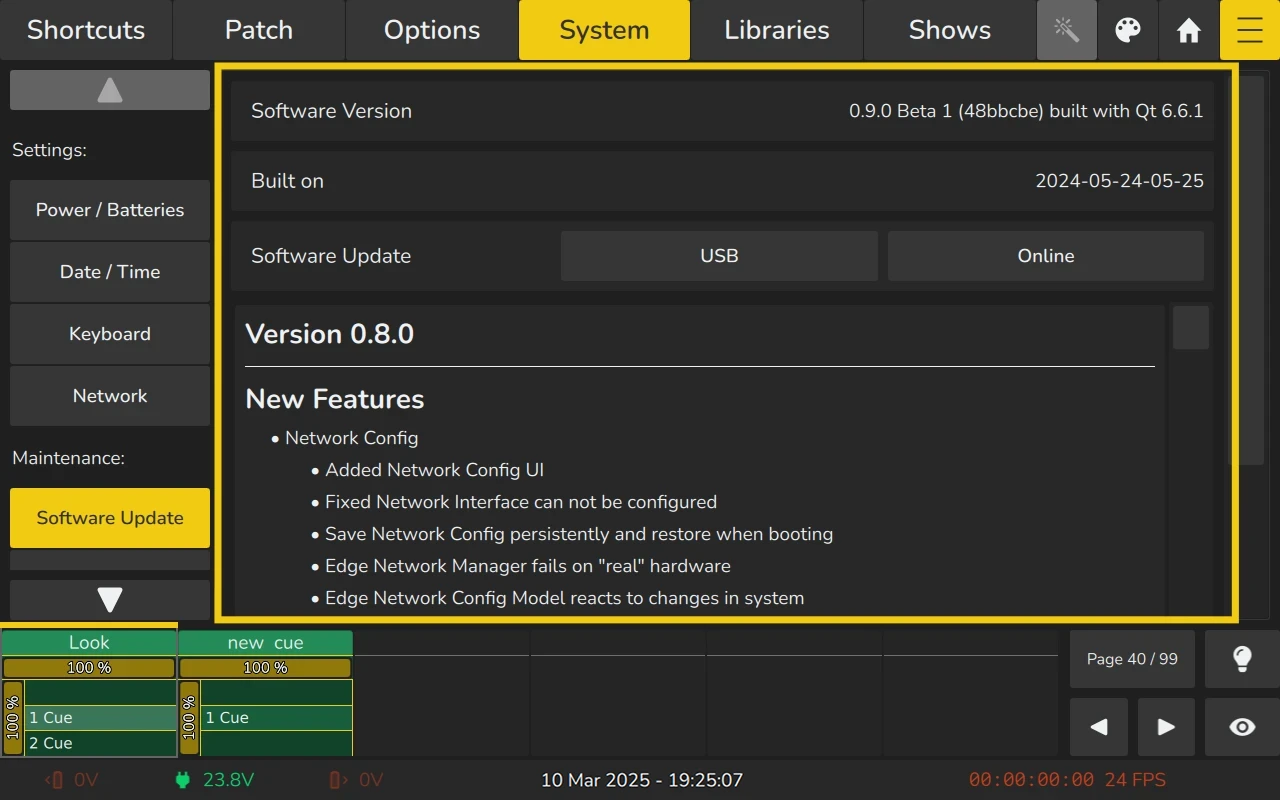
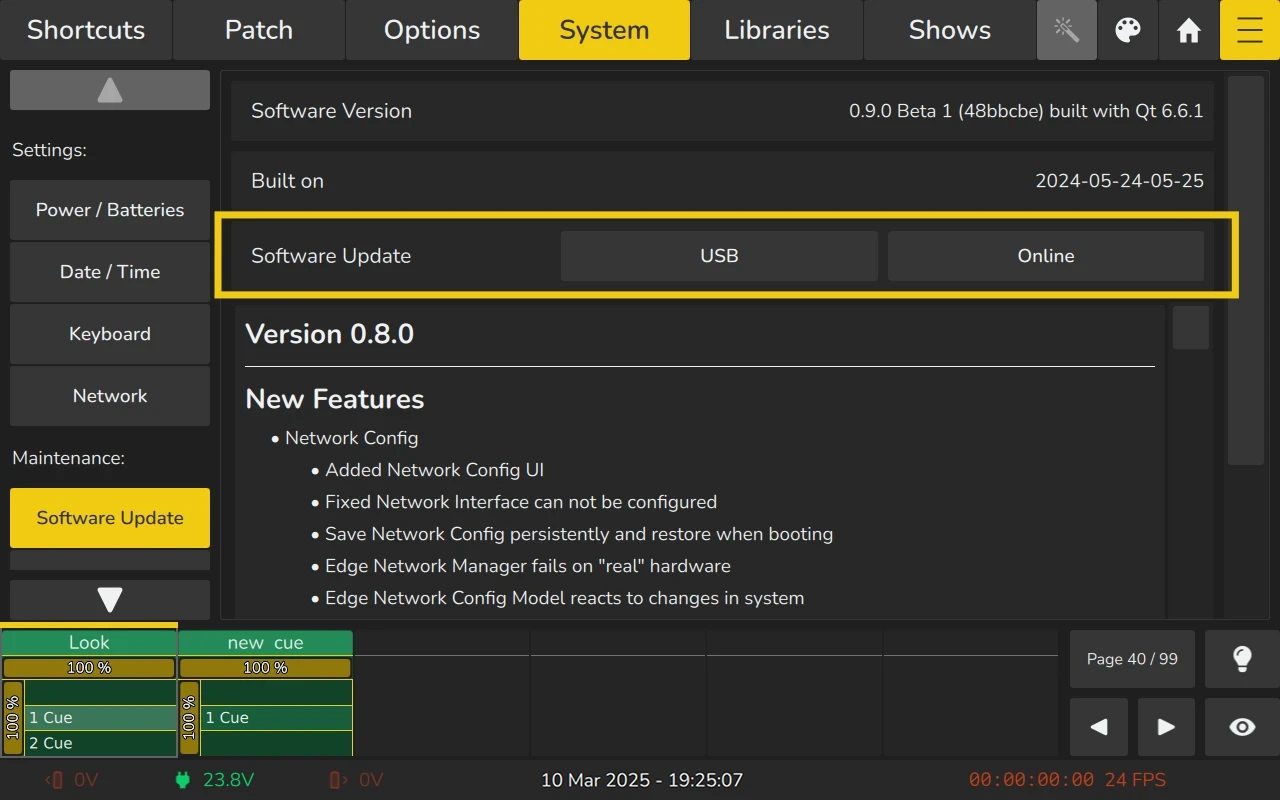
5.4.5 Software Update
In this page you will be able to check and update the software version of the console. You can also read the Release Notes of the installed Software Version here.
The console can be updated using an update file on the USB Stick or from an online server when connected to the internet.
The Software update process reboots the console at the end. Make sure you saved your show before updating.
Updating EDGE using USB
EdgeGo is compatible only with USB sticks formatted in FAT32 with a maximum size of 32GB.
If your USB stick is larger, create a partition and format one partition in FAT32 with a size below 32GB.
- Download the latest Software Version from the Prolights Website.
- Make sure the file ending is
.ssu. - Copy the .ssu file to the
edge/software_updatefolder onto a FAT formatted USB Stick. Make sure theedgefolder is located in the root of your USB key. - Connect the USB Stick to the EDGE console.
- Open the Menu by clicking the Menu button and change to the System tab.
- Click on Software Update.
- Click on USB.
- A wizard will walk you through the update process. The console will save the showfile and restart automatically after the update is completed successfully.
Updating EDGE using the Online Update functionality
- Make sure the console is connected to the internet.
- Open the Menu by clicking the Menu button and change to the System tab.
- Click on Software Update.
- Click on Online.
- A wizard will walk you through the update process. The console will save the showfile and restart automatically after the update is completed successfully.
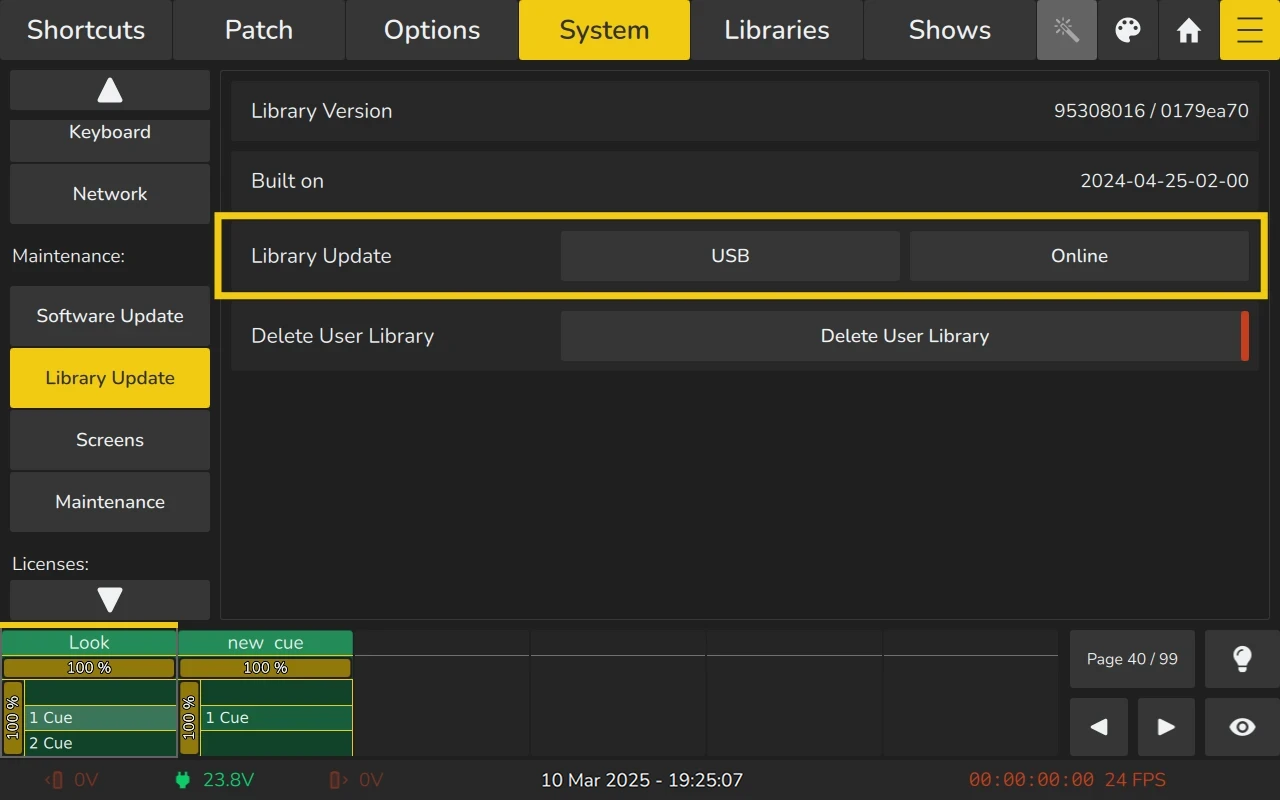
5.4.6 Library Update
We build nightly library updates which contain the latest changes from the AtlaBase library.
You can check if your fixture is included in the latest update and download the update file directly from our Library Update page.
There are two ways to update the Factory Fixture Library: via USB or Online.
Updating the fixture library using USB
EdgeGo is compatible only with USB sticks formatted in FAT32 with a maximum size of 32GB.
If your USB stick is larger, create a partition and format one partition in FAT32 with a size below 32GB.
- Download the latest Library Version from the Library Update page.
- Make sure the file ending is
.faclib. - Copy the .faclib file to the
edge/factory_libraryfolder on a FAT formatted USB Stick. Make sure theedgefolder is located in the root of your USB key. - Connect the USB Stick to the EDGE console.
- Open the Menu by clicking the Menu button and change to the System tab.
- Click on Library Update.
- Click on USB.
- A wizard will walk you through the update process. The console will save the showfile and restart automatically after the update is completed successfully.
Updating the fixture library using the online update functionality
- Make sure the console is connected to the Internet.
- Open the Menu by clicking the Menu button and change to the System tab.
- Click on Library Update.
- Click on Online.
- A wizard will walk you through the update process. The console will save the showfile and restart automatically after the update is completed successfully.
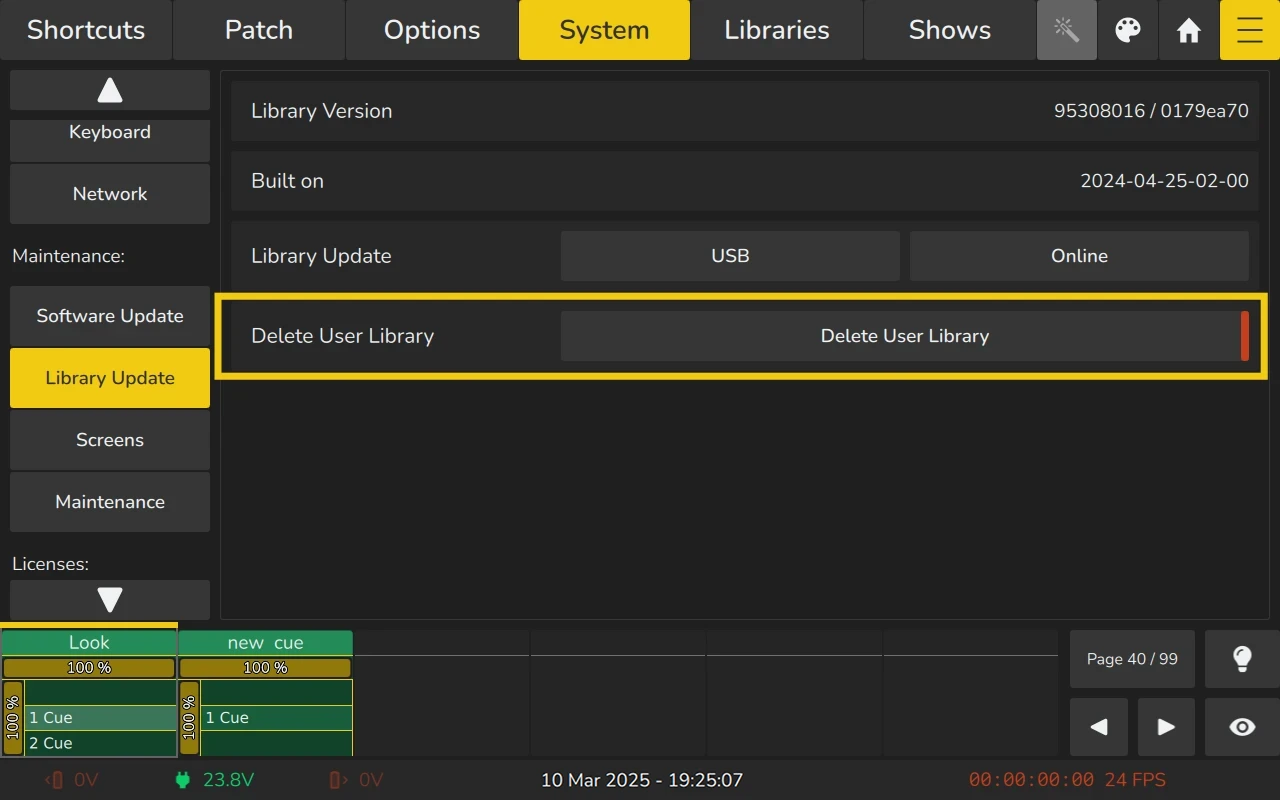
Deleting the User Library
- Open the Menu by clicking the Menu button and change to the System tab.
- Click on Library Update.
- Click on Delete User Library.
- A confirmation dialog will appear. Click Yes, Delete! To confirm. The console will save the showfile and reboot afterwards.
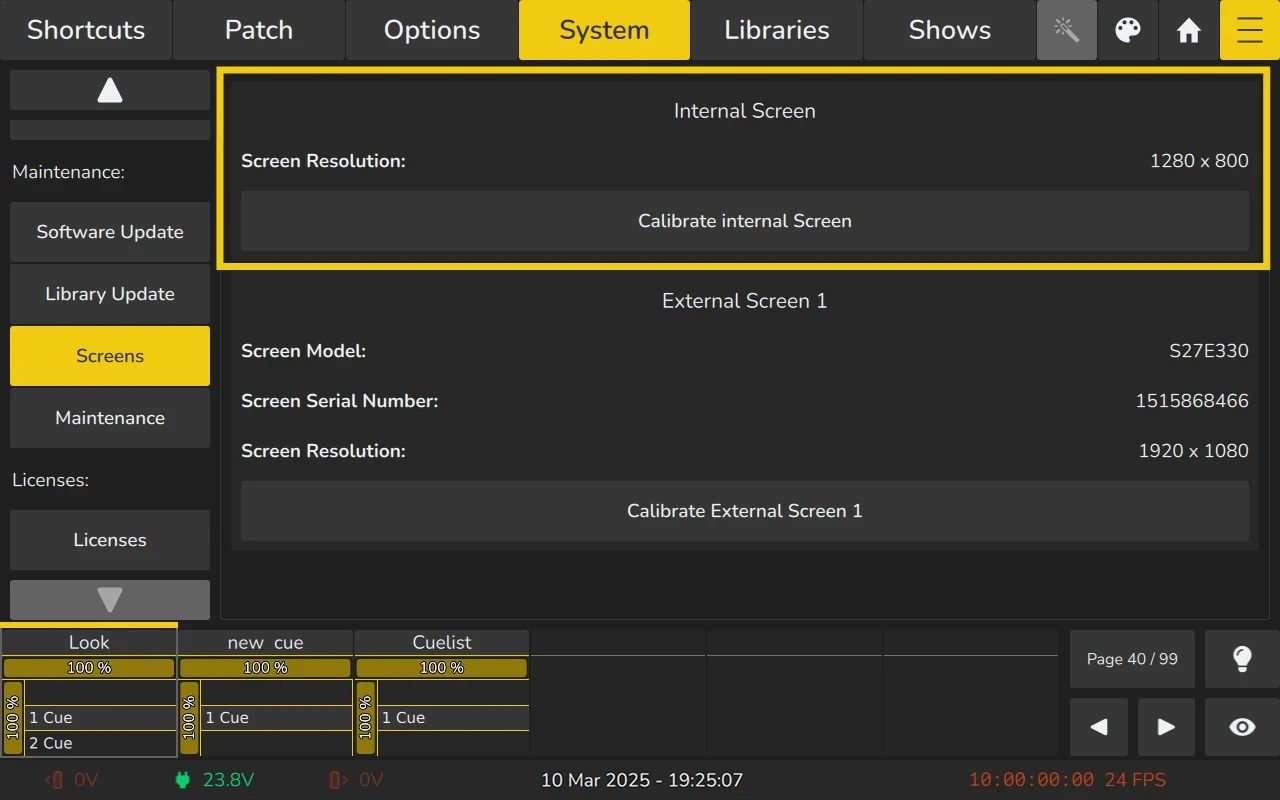
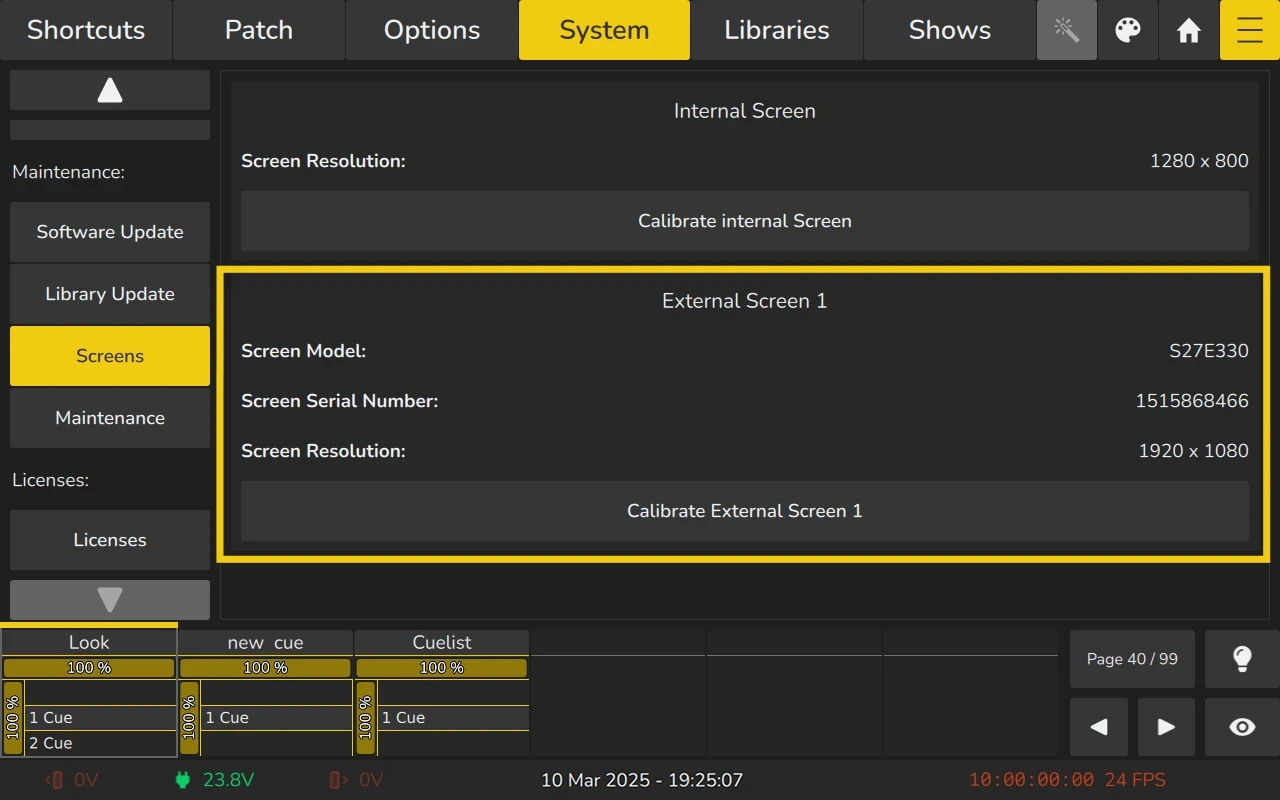
5.4.7 Screen Settings
Within the Screens page, you may see the resolution of the internal and any external screen connected. You may as well calibrate them.
Calibrate Internal Screen
Should the internal touchscreen become misaligned and not properly follow your clicks, you may need to calibrate it. In this case the following steps need to be taken:
- Open the Menu by clicking the Menu button and change to the System tab.
- Click on Screens.
- Click on Calibrate Internal Screen.
- A wizard will walk you through the calibration process.
Alternatively, you can use the EDGE + Tools buttons on the front panel and keep them pressed for two seconds to start the calibration process.
Calibrate External Screen
After connecting a secondary touchscreen, it is usually misaligned and does not properly follow your clicks. In this case you will need to calibrate it. To do that, the following steps need to be taken:
- Open the Menu by clicking the Menu button and change to the System tab.
- Click on Screens.
- Click on Calibrate External Screen 1.
- A wizard will walk you through the calibration process.
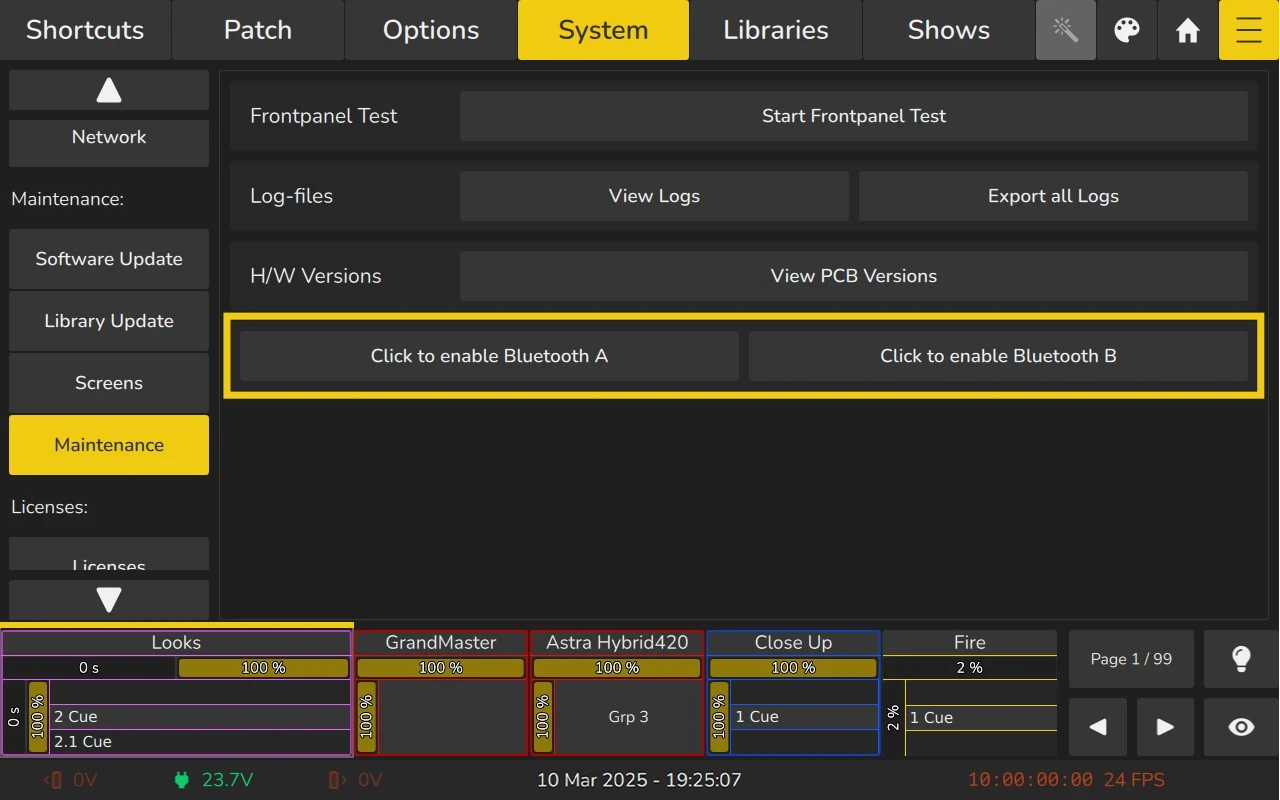
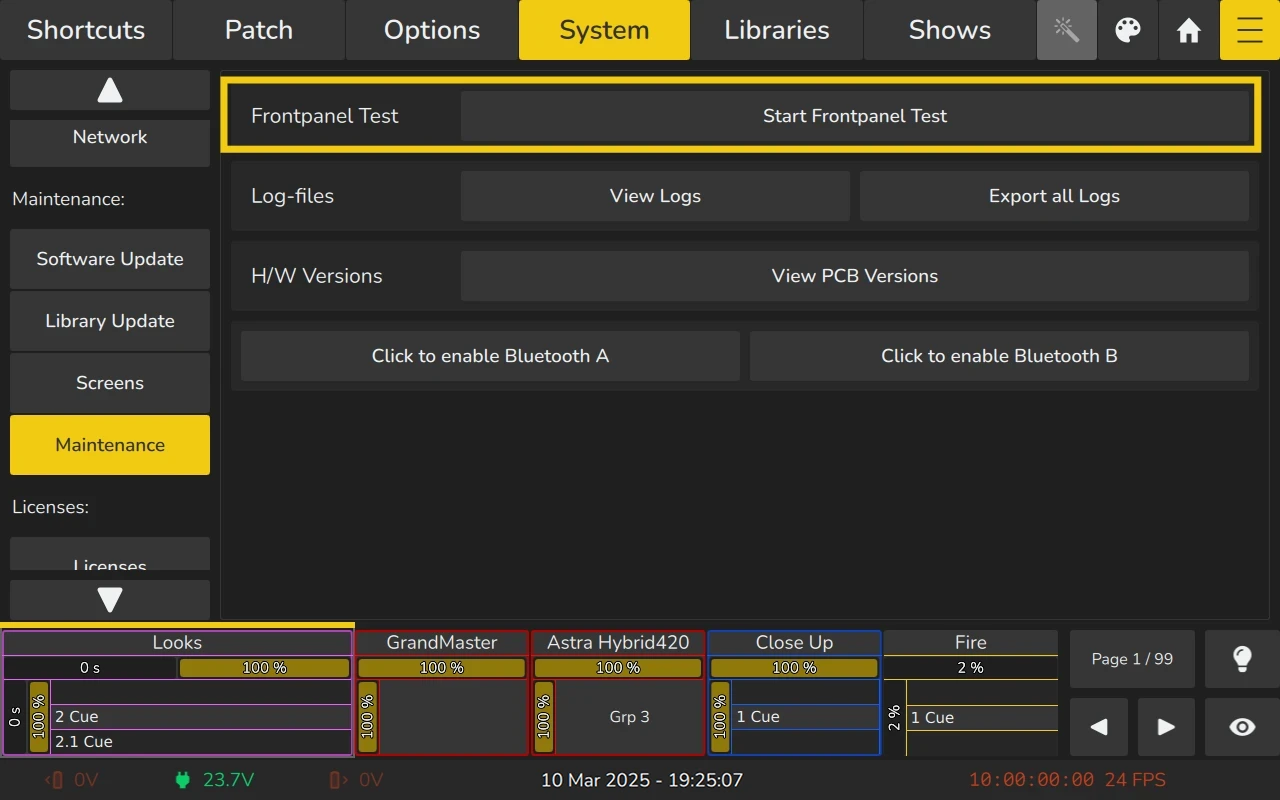
5.4.8 Maintenance Menu
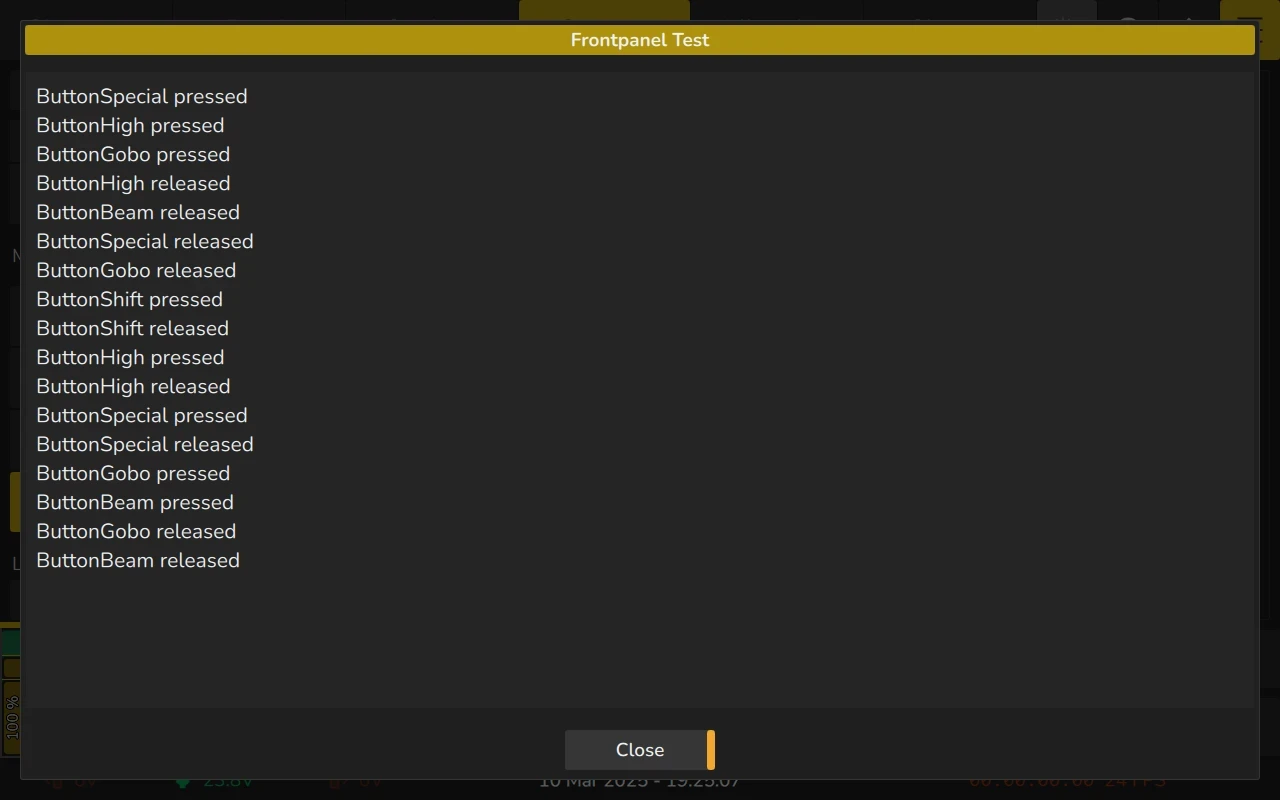
Testing the Front Panel Hardware
If you suspect that buttons, faders, encoders, or LEDs on the front panel are not functioning correctly, you can perform a hardware test. To test the front panel:
- Open the Menu by clicking the Menu button and change to the System tab.
- Click on Maintenance.
- Select Front Panel Test.
During the test, all button presses, encoder movements, and fader adjustments will be displayed in the window. The LEDs on the front panel will cycle through multiple colors.
Once the test is complete, close the dialog. The front panel will return to its previous state.
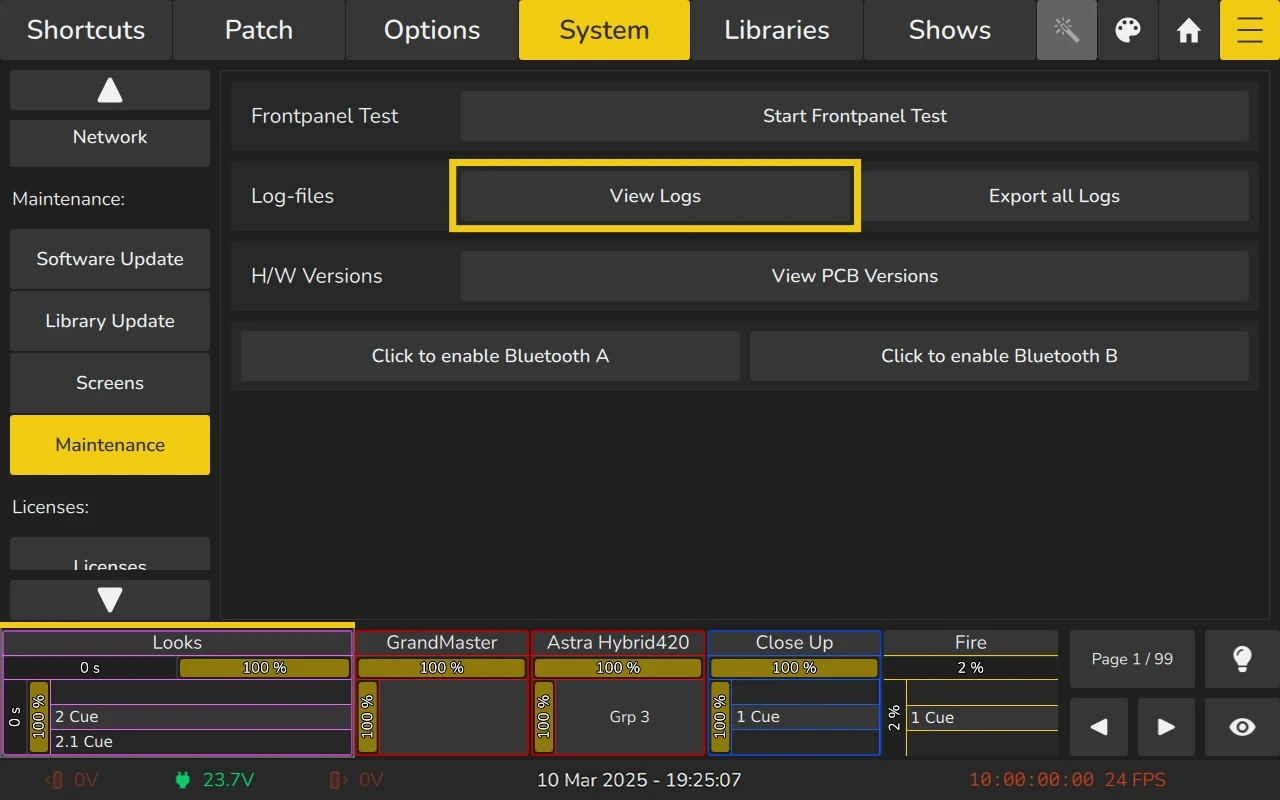
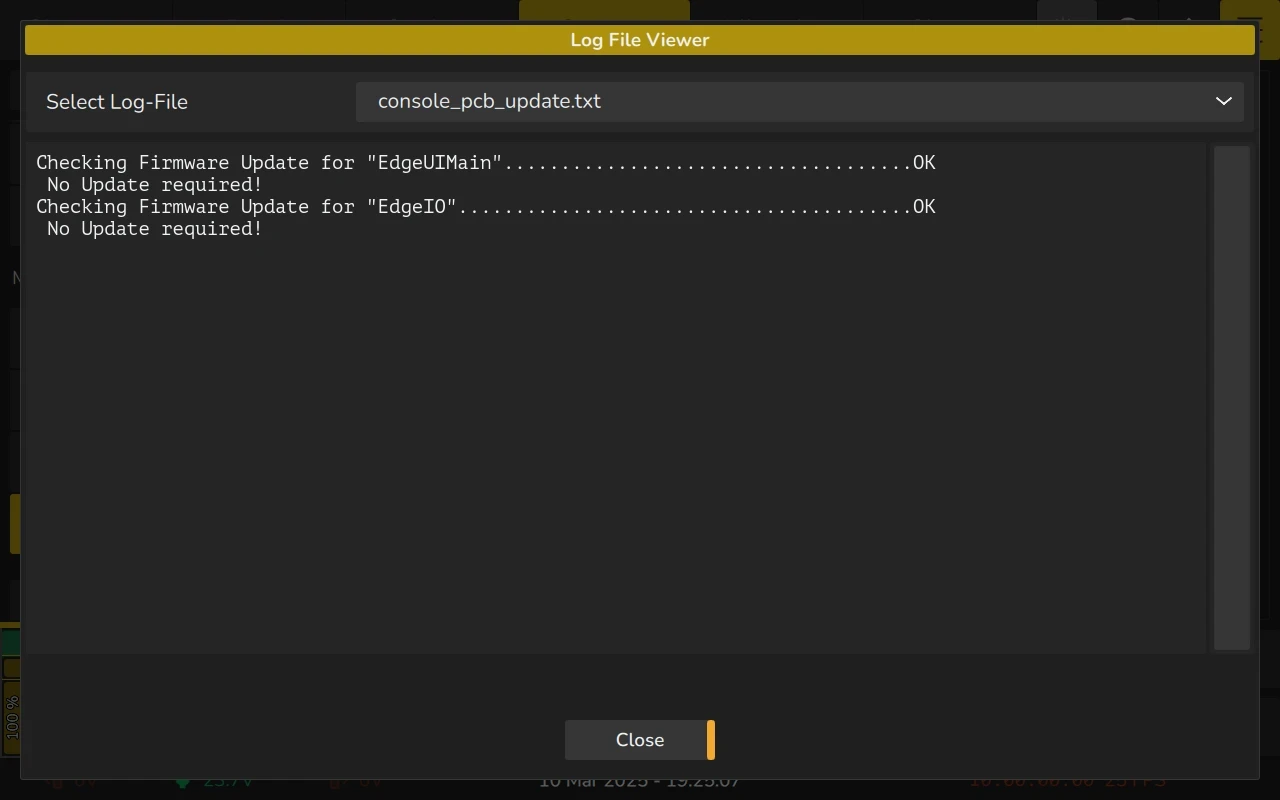
Viewing Log Files
Log files are useful for identifying errors in the show file, libraries, or other parts of the software. They contain detailed information that can help developers troubleshoot issues.
To view the log files:
- Open the Menu by clicking the Menu button and change to the System tab.
- Click on Maintenance.
- Click on the View Logs button.
This will display the log files for review.
Log files are not persistent and are cleared when the console is rebooted or shut down. Be sure to export the log files immediately after an abnormality occurs.
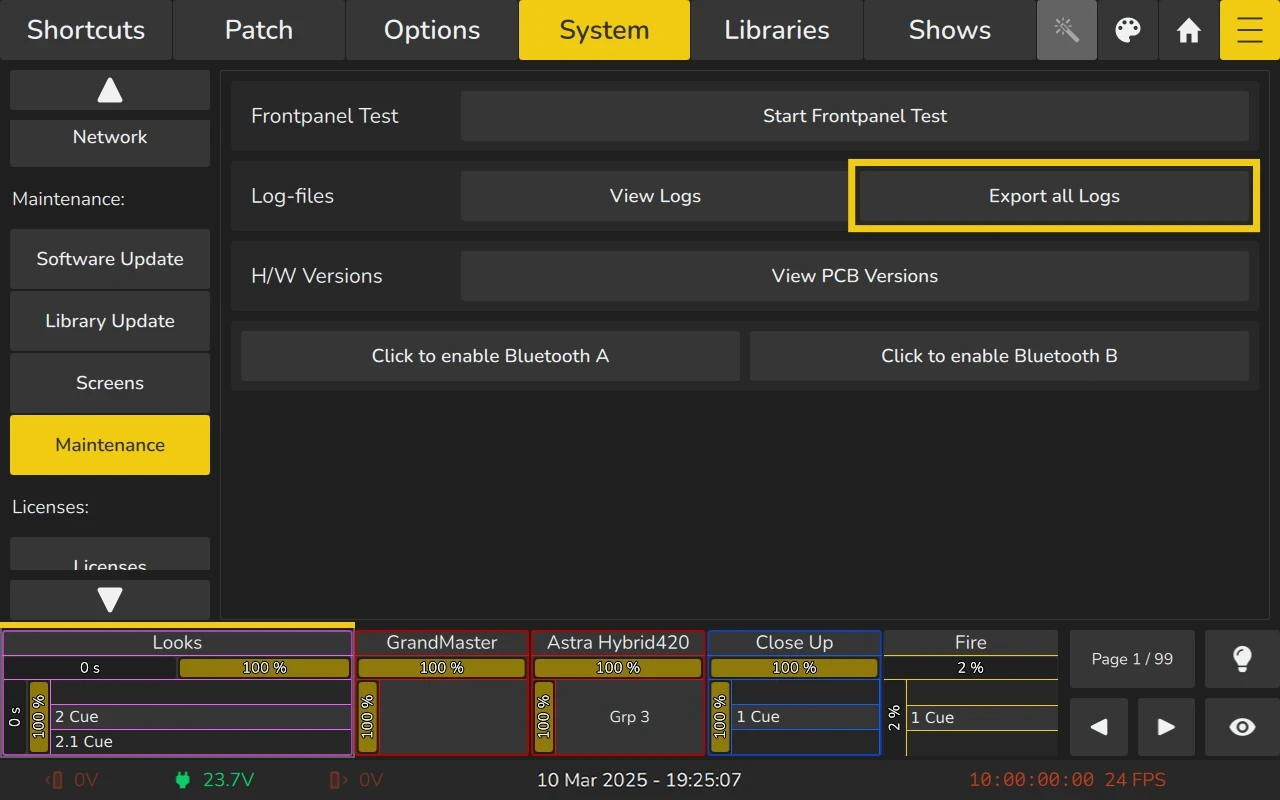
Exporting Log Files
Log files contain valuable information for identifying errors in the show file, libraries, or other parts of the software. You can export these log files for further analysis or to share with developers.
To export the log files:
- Open the Menu by clicking the Menu button and change to the System tab.
- Click on Maintenance.
- Ensure a FAT formatted USB stick is plugged into the console.
- Click on the Export all Logs button.
The log files will be exported to the USB stick.
Log files are not persistent and are cleared when the console is rebooted or shut down. Be sure to export the log files immediately after an abnormality occurs.
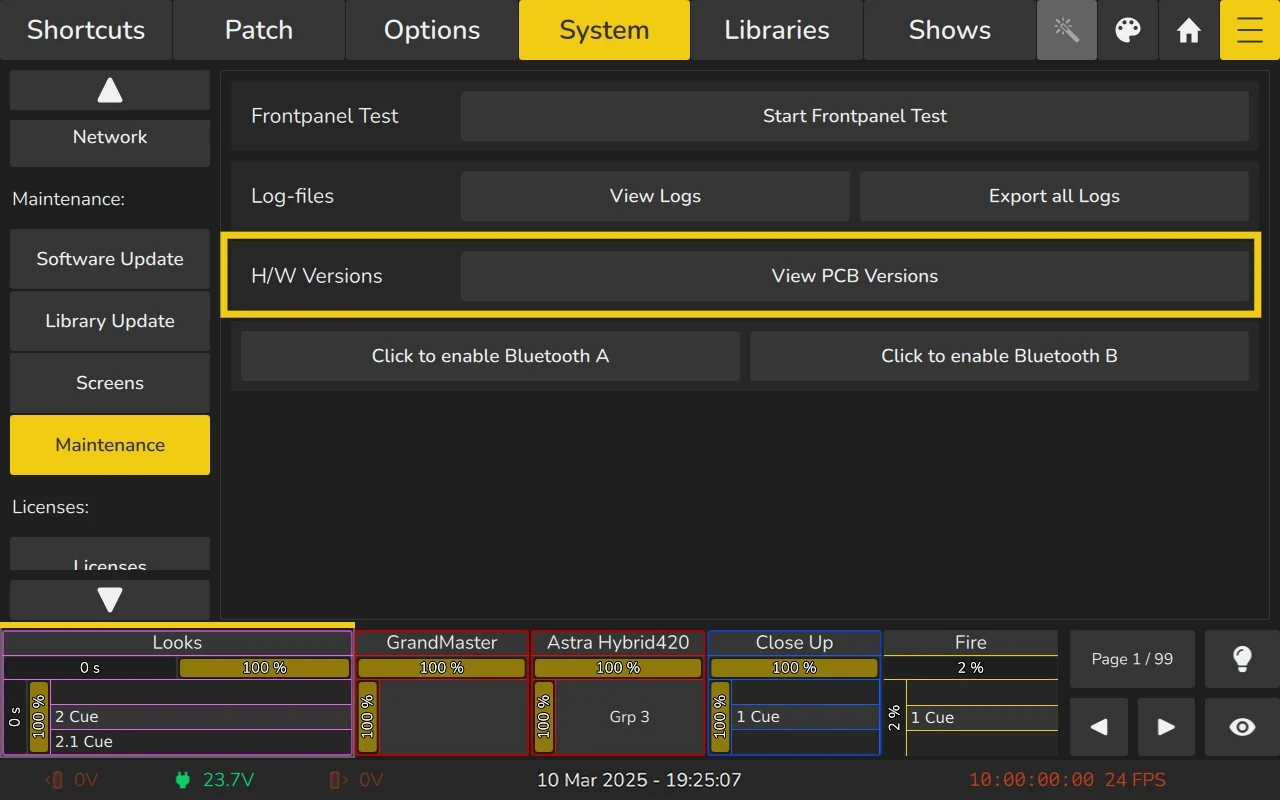
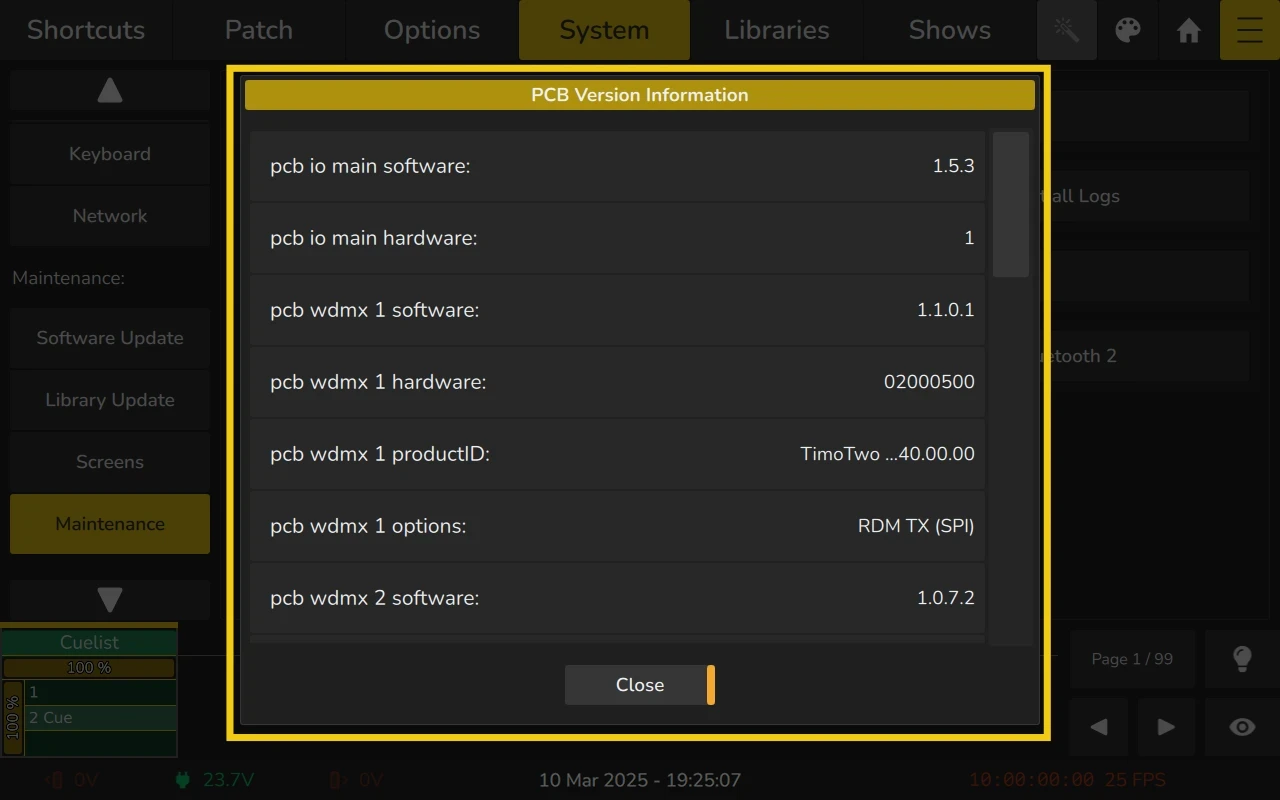
Viewing PCB Hardware / Firmware Versions
Support staff may request your console's hardware and firmware versions. To check the installed versions:
- Open the Menu by clicking the Menu button and change to the System tab.
- Select Maintenance.
- Click on the View PCB Versions button.
A dialog will appear displaying the PCB version information.
Enabling Bluetooth for the Wireless DMX Modules
The Wireless DMX Interfaces can be updated via Bluetooth and the CRMX Toolbox Application published by LumenRadio, however only firmware versions tested and supported by the EDGE software can be used.
Currently, only firmware version 1.1.0.1, 1.1.1.0 and 1.1.1.5 of the WDMX Module is supported.
To enable Bluetoth:
- Open the Menu by clicking the Menu button and change to the System tab.
- Select Maintenance.
- Click on the Enable Bluetooth button for either Interface 1 or 2..
A confirmation Dialog will appear.