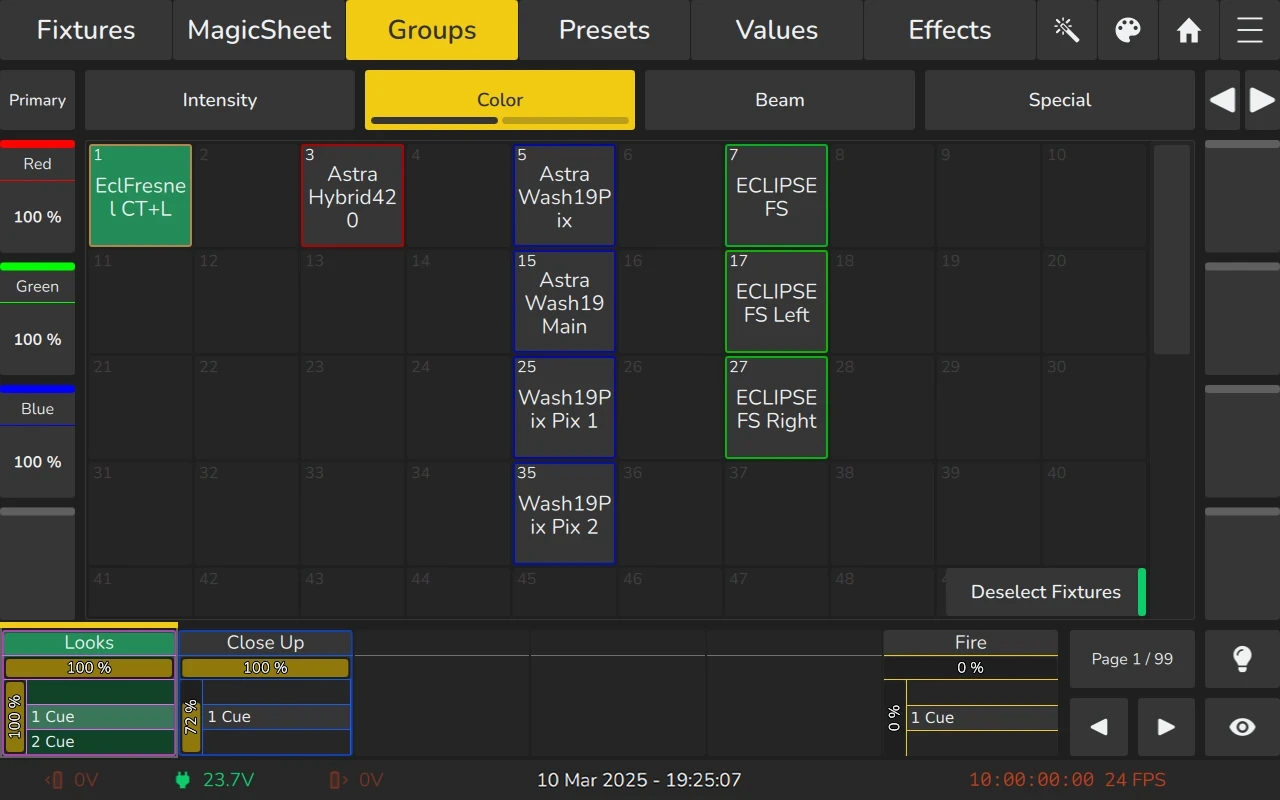
6.3 The Groups View
Groups are a programming aid designed to help streamline fixture selection and control during programming. They allow you to store and organize fixtures into logical sets, making it easier to access and manipulate specific groups of fixtures at once. Groups store information about fixture selection and the order in which fixtures are selected, which helps when programming cues or effects.
By organizing fixtures into groups, you can save time and reduce the complexity of programming tasks. Instead of manually selecting individual fixtures each time, you can quickly select an entire group with a single action. This is especially helpful in large setups with many fixtures, where grouping allows for faster adjustments and more efficient programming.
To open the Groups View:
- Click on the Home
 button.
 - Select Groups from the buttons on top.
Groups are selected and deselected by clicking on them.
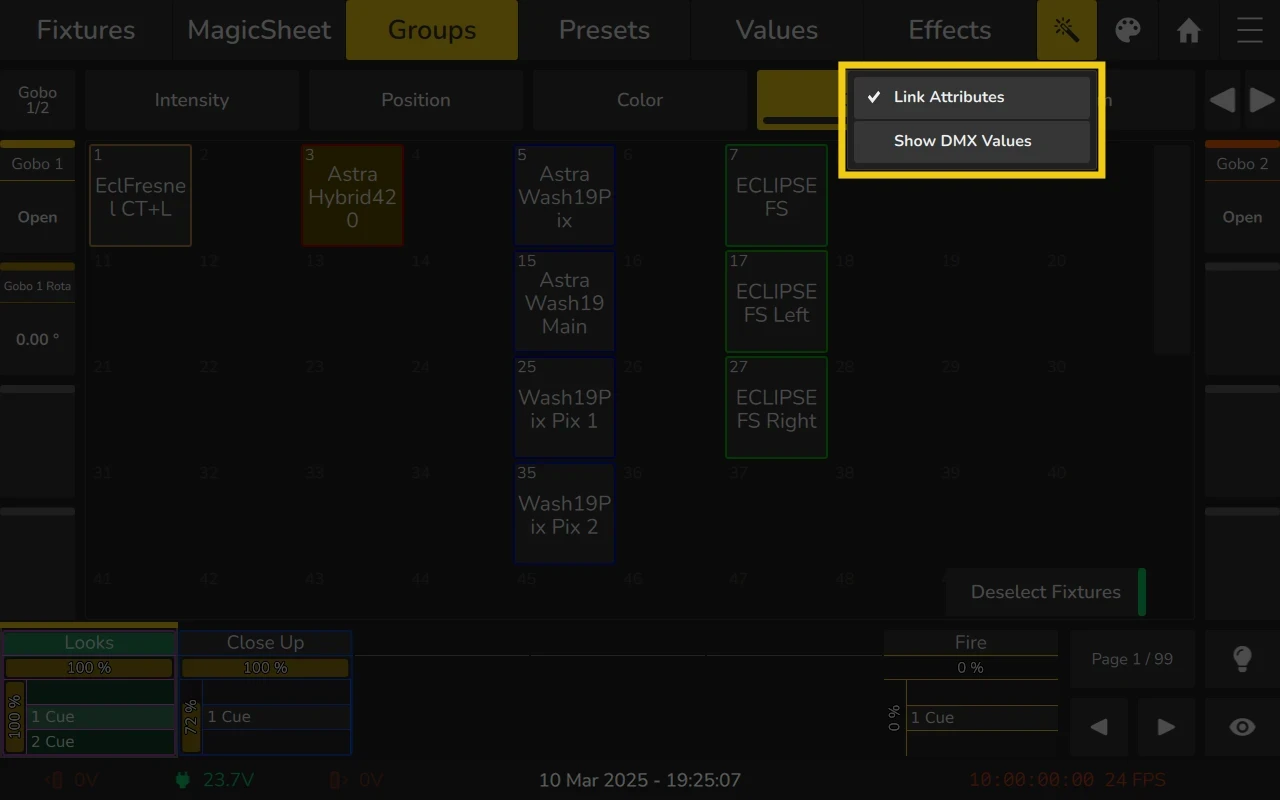
6.3.1 The Group View Context Menu (Magic Wand Button)
You can access this menu by clicking on the Magic Wand  Button within the Groups View.
The menu includes the following options:
- Link Attributes:
This option allows you to link attributes of selected fixtures. This ensures that for example when “Red” is changed, the corresponding other colors are touched as well. - Show DMX Values:
Enable this option to display DMX values for fixtures in the values table and encoders instead of ranges.
6.3.2 The Group Item
The Group Item itself provides several layers of feedback to you:
| Item | Meaning |
|---|---|
 | This Group Item has the name “Not Selected” and is not selected. |
 | This Group has the name “Fully Selected” and is selected (green background). |
 | This Group has the name “Implicitly Fully Selected” and indicates that all Fixtures inside the group are selected even though the Group itself is not selected (dark green background). |
 | This Group has the name “Partly Selected” and indicates that the Group is selected but some Fixtures inside the group have been deselected (yellow background). |
 | This Group has the name “Implicitly Partly Selected” and indicates that some Fixtures inside the group are selected even though the Group itself is not selected (dark yellow background). |
 | This Group is empty. |
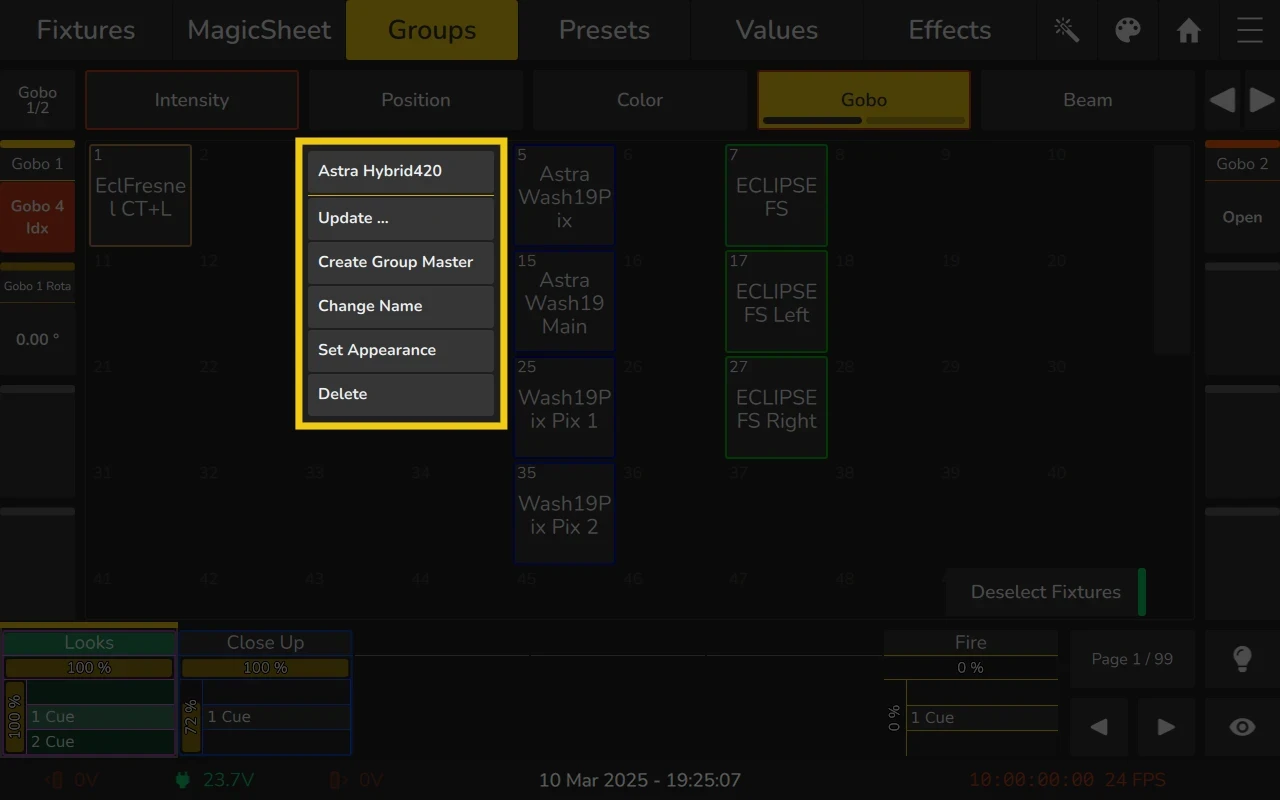
6.3.3 The Group Item Long-Click Menu
The long-click menu provides distinct sets of actions based on whether it is invoked within an empty or non-empty Group Item.
If the selected Group is empty, long-pressing will record a new Group using the selected Fixtures. However, if no Fixtures are selected, an error message will appear, indicating the necessity of selecting Fixtures before proceeding with the creation of a new Group.
When activated within a non-empty item, the long-click menu offers the following options:
- Update
Used to update the group with the current fixture selection and settings. - Create Group Master
Allows you to select a playback fader to create a dimmer master for the group, enabling quick control over the group's intensity. - Change Name
Allows you to rename the group for better organization or clarity. - Set Appearance
Lets you add a colored border around the group item for visual distinction. - Delete
Deletes the group item from the Groups View.
6.3.4 Working with Groups
Selecting and Deselecting Groups
To select or deselect a group:
- Open the Groups View or a Magic Sheet containing the group on either the internal or external screen.
- Tap on a group to select the fixtures contained in the group.
- To deselect a group, tap on the selected group again.
Recording Groups
To record a group:
- Select at least one fixture.
- Switch to the Groups View.
- Press Record on the console's front panel.
- Select an empty item in the Groups View, either on the internal or external screen.
- Enter a name for the new group when prompted.
- Press OK to confirm.
Alternative Methods:
- Long-press an empty group item.
Groups store the order in which the items were selected. This feature can be useful when creating effects, as explained later in the manual.
Adding Fixtures to an existing Group
To add fixtures to an existing group:
- Select at least one fixture.
- Switch to the Groups View.
- Press Record on the console's front panel.
- Select the existing group you want to update from the Groups View, either on the internal or external screen.
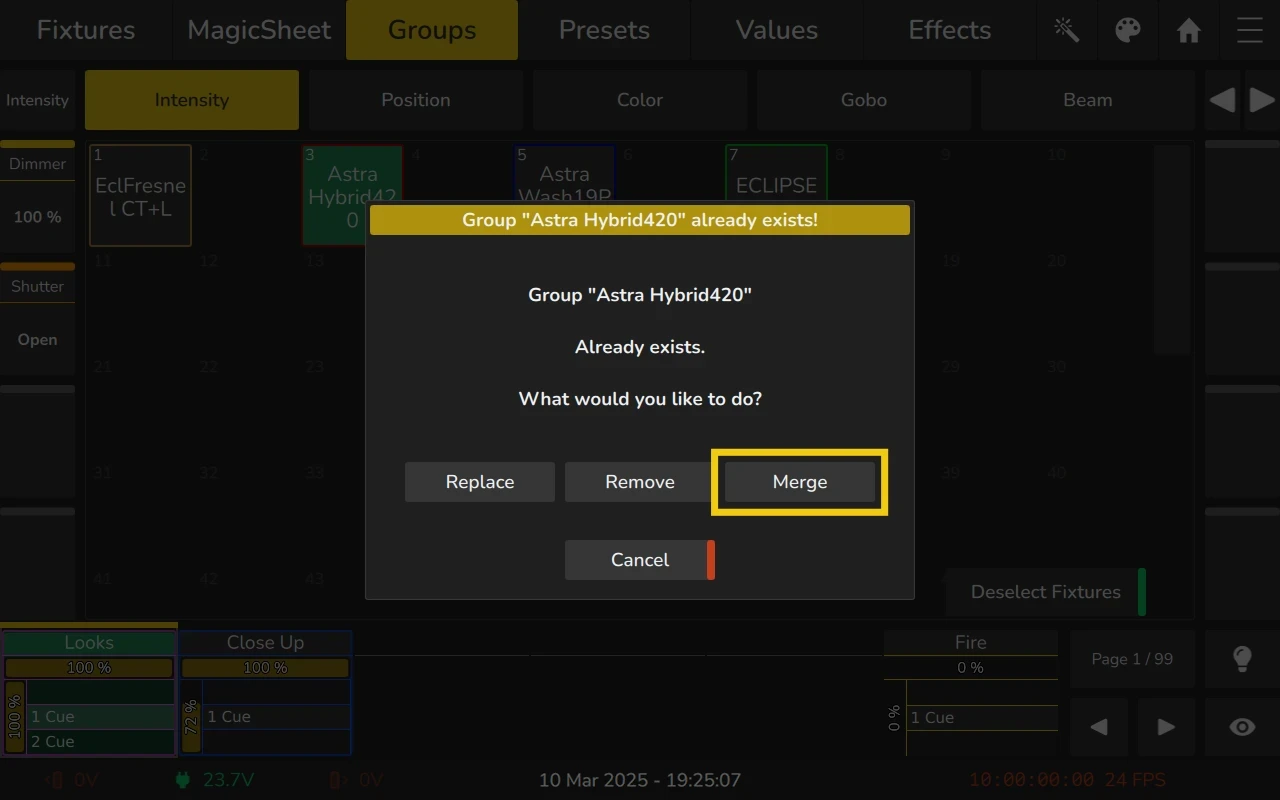
- When prompted, choose Merge to add the selected fixtures to the group.
Alternative Methods:
- Long-press the group and select Update... from the long-press menu.
- Press the Record button multiple times until the command line reads Merge, then select the group to update.
Fixtures added to a group will be added after the last fixture in this group.
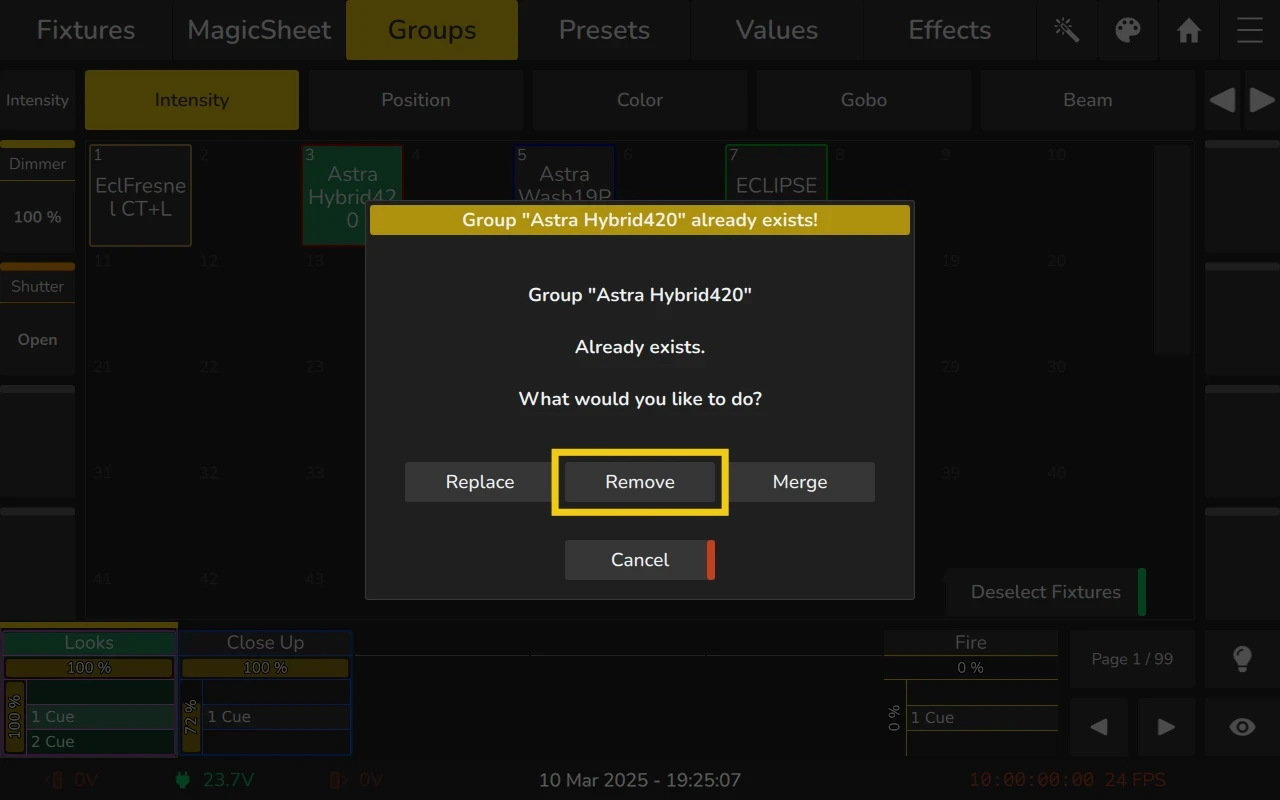
Removing Fixtures from an Existing Group
To remove fixtures from an existing group:
- Select the fixtures you want to remove.
- Switch to the Groups View.
- Press Record on the console's front panel.
- Select the existing group you want to update from the Groups View, either on the internal or external screen.
- When prompted, choose Remove to delete the selected fixtures from the group.
Alternative Methods:
- Long-press the group and select Update... from the long-press menu.
- Press the Record button multiple times until the command line reads Remove, then select the group to update.
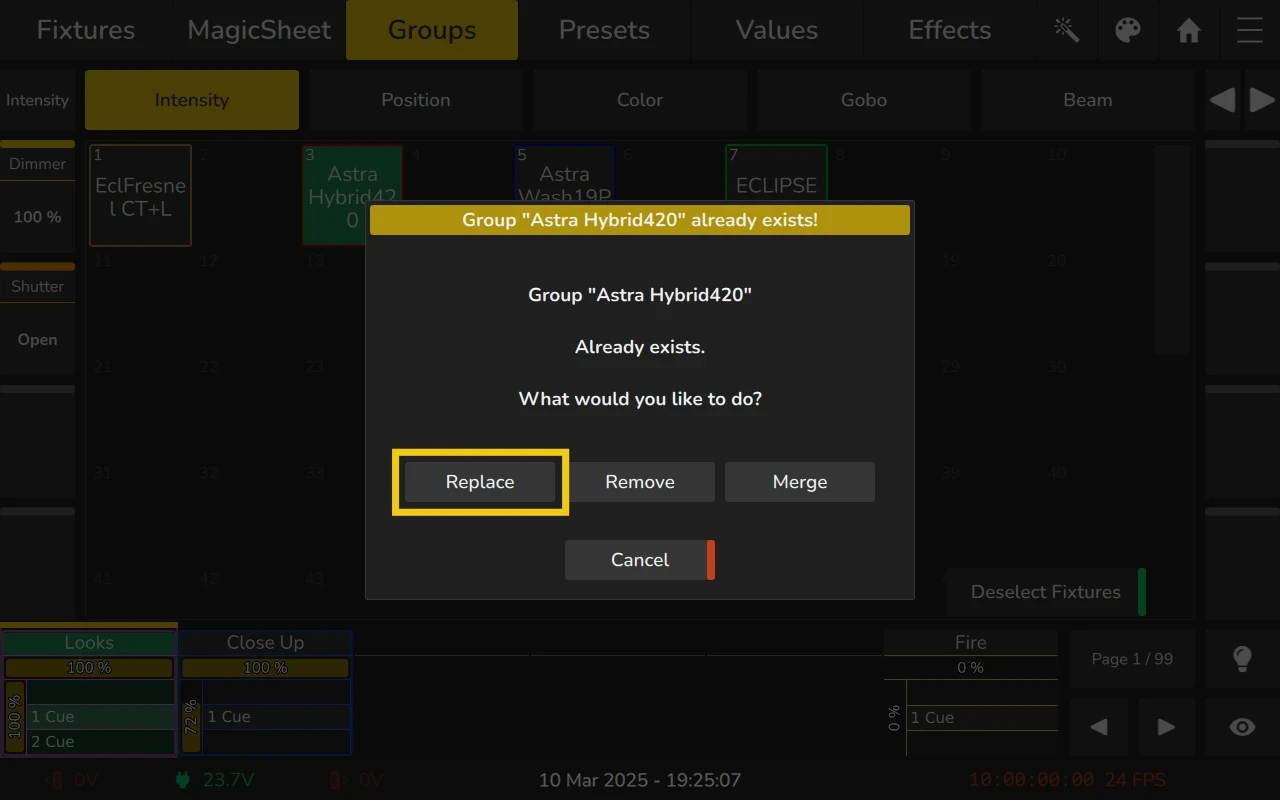
Replacing a Group
To replace all fixtures stored in an existing group:
- Select the fixtures you want to use as the replacement.
- Switch to the Groups View.
- Press Record on the console's front panel.
- Select the existing group you want to update from the Groups View, either on the internal or external screen.
- When prompted, choose Replace to overwrite the entire group's contents with the selected fixtures.
Alternative Methods:
- Long-press the group and select Update... from the long-press menu.
- Press the Record button multiple times until the command line reads Replace, then select the group to update.
Replacing fixtures will overwrite all fixtures stored in the group, removing any previously stored selections.
Naming Groups
To rename a group:
- Press the Name key on the console's front panel.
- Select the group you wish to rename.
- A dialog will open, prompting you to enter the new name.
- Enter the desired name and press OK to confirm.
Alternative Methods:
- Long-press the group and select Change Name. from the long-press menu.
Setting Appearance (colored border) for a Group
To change the appearance (colored border) of a group:
- Press the Name key on the console's front panel twice. The command line will change to "Appearance."
- Select the group you want to modify.
- Choose a new appearance color when prompted.
- Press OK to confirm.
Alternative Methods:
- Long-press the group and select Set Appearance. from the long-press menu.
Copying Groups
To copy a group:
- Press the Copy key on the console's front panel.
- Select the group you want to copy.
- Select the destination group item where the copy will be created.
When a group is copied, the copied group is entirely independent of the original, meaning both the source and the new group can be modified freely without affecting one another.
Moving Groups
To move a group:
- Press the Copy key on the console's front panel twice. The command line will now display "Move".
- Select the group you want to move.
- Select the destination group item where the group will be relocated.
When a group is moved, all references to the group-such as group masters, MIDI commands, and other assignments-are automatically updated to reflect the new location.
Deleting Groups
To delete a group:
- Switch to the Groups View on either the internal or external screen.
- Press Delete on the console's front panel.
- Select the group you wish to delete from the Groups View.
- The console will ask for confirmation before deleting the group.
You may select multiple groups to be deleted by holding down the Delete key while selecting the items to be deleted.
Alternative Method:
You can also long-press the group and select Delete from the long-press menu.
Deleting a group will also remove all elements that reference it, such as group masters, MIDI commands, and any other related configurations. Deleting a group does not remove any data from cues or cuelists.
Creating a Group DImmer Master
To create a Group DImmer Master:
- Press the Copy key on the console's front panel.
- Select the group you wish to create a Dimmer Master for..
- Select the destination Playback, either by clicking on the Playback Label or by pushing the button of the playback on the frontpanel.
Alternative Methods:
- Long-press the group and select Create Group Master from the long-press menu and tap on the fader label or button of the destination Playback.
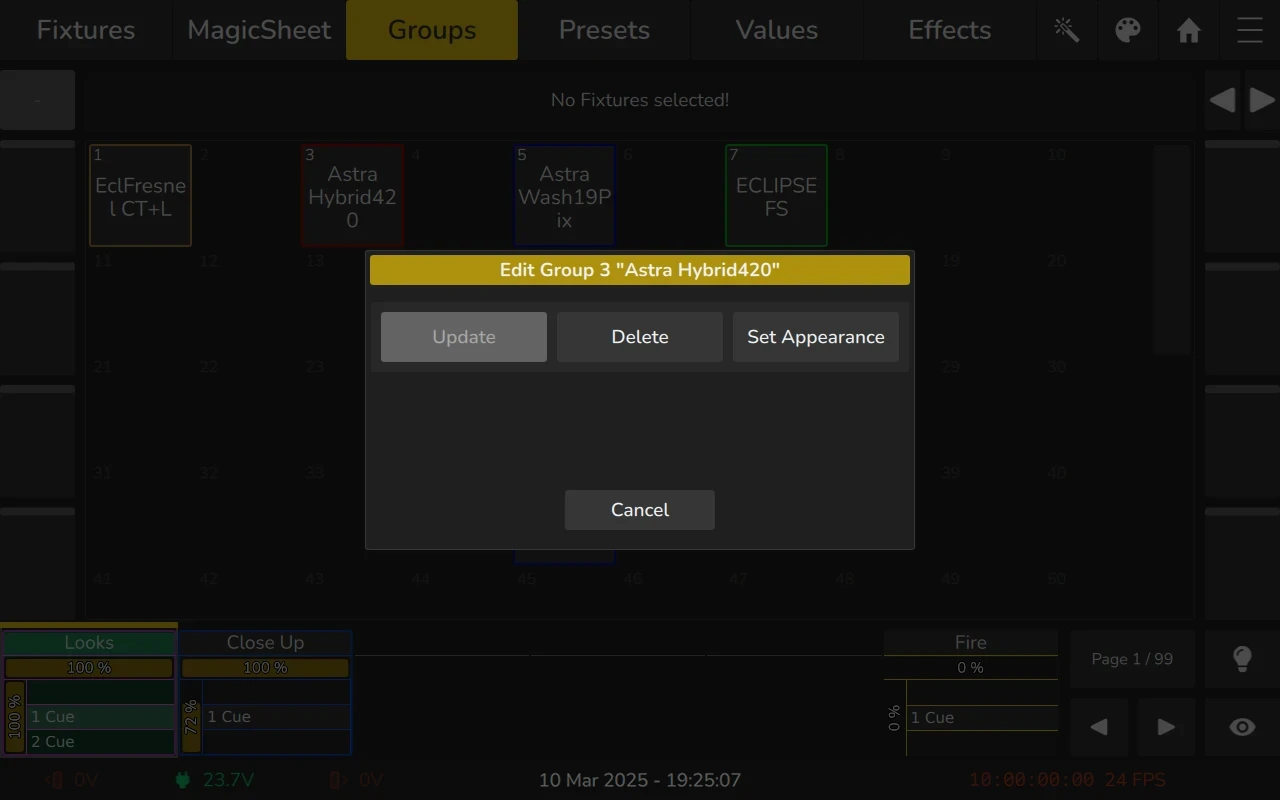
6.3.5 Edit Group Dialog
You can open the Edit Group Dialog by pressing Edit on the front panel and selecting a group from either the internal or external Groups View or MagicSheet..
The Edit Group Dialog provides the following options:
- Update: Allows you to update the group.
- Delete: Removes the group from the system.
- Set Appearance: Lets you adjust the visual appearance of the group, such as adding a colored border.