7.4 Adjusting Playback Settings
The Playback Fader View provides all settings for the cuelist playback displayed in the Playback Window by using the Settings Tab.
To access the settings of a cuelist playback, open the Playback Fader View by clicking on the Playback Fader Label or by pressing Edit followed by the Playbacks button or Fader Label. Then click on the Settings button found in the top toolbar.
Groups and GrandMaster Playbacks do not have Item Settings.
7.4.1 Playback Settings
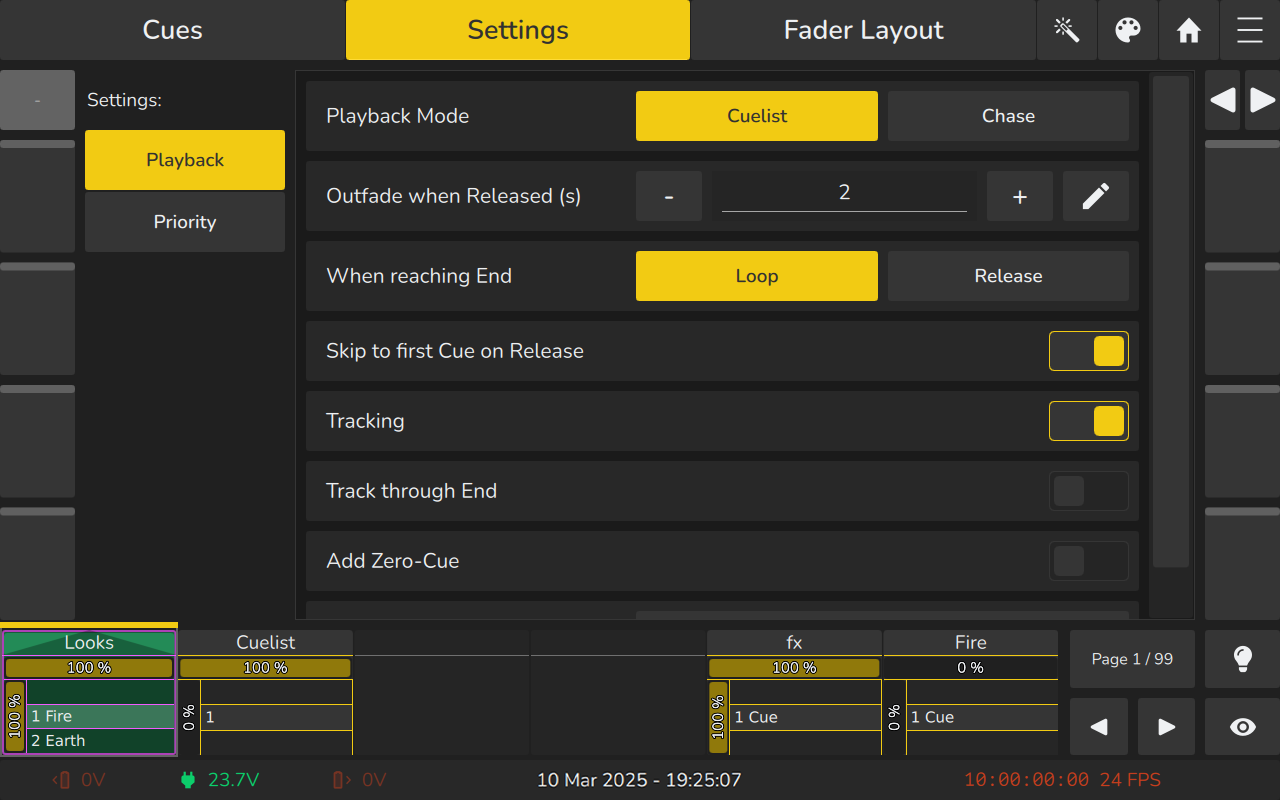
Playback Mode
To set the mode for a playback, open the Playback Settings by clicking on the Playback Label or pressing Edit followed by a button of the playback and then select Settings from the top toolbar.
Playbacks can be set to one of two modes: Cuelist or Chase.
- Cuelist mode follows individual cue timings and trigger settings.
- Chase mode replaces all cue timings with global Fade and Snap timings from the Chase configuration options. The cue-dependent trigger selection is disabled, and instead, the global Chase Trigger Options from the Playback Settings dialog are used.
The Chase Crossfade setting is also displayed in the Playback View when a chase is selected.
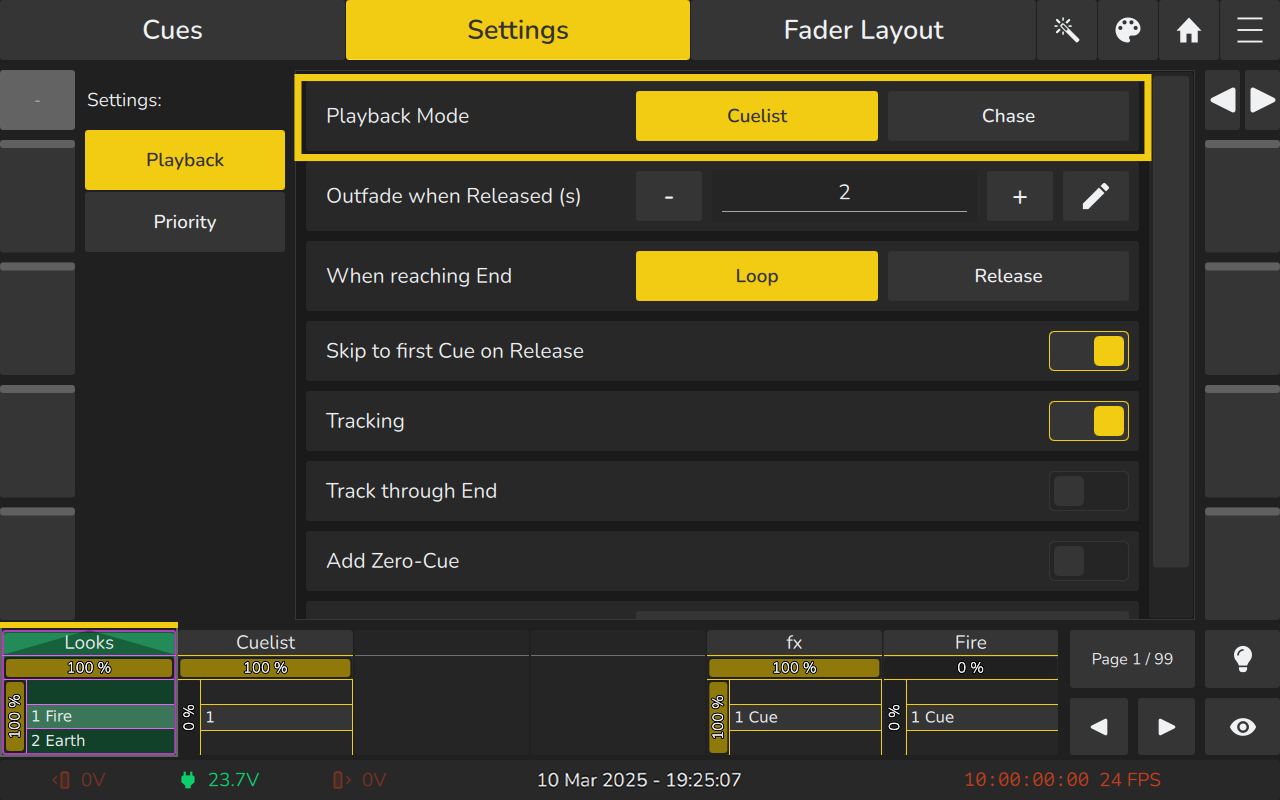
Outfade when Released Time
To define whether a playback should switch off instantly or fade out when released, open the Playback Settings by clicking on the Playback Label or pressing Edit followed by the button of the playback. Then, select Settings from the top toolbar.
Adjust the value in the Outfade when Released spin box to set an off fade time.
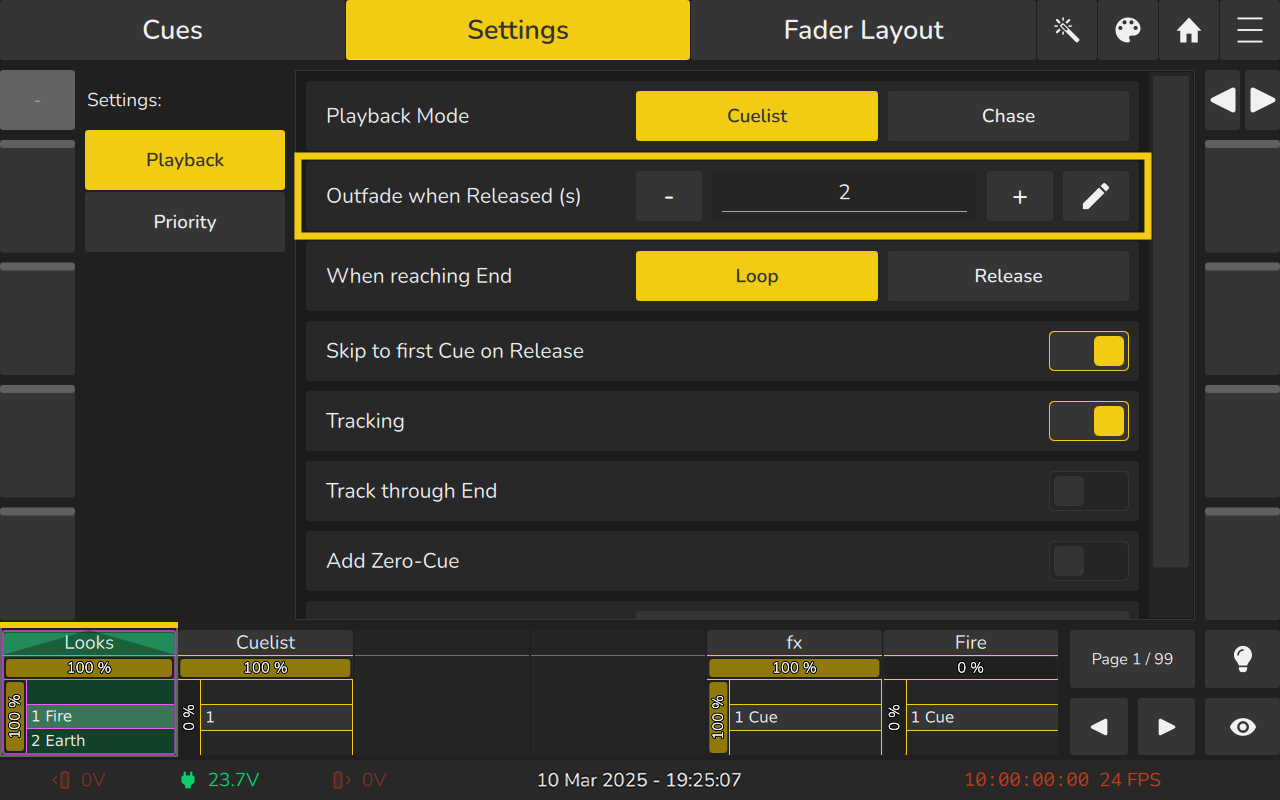
Specifying what happens when reaching the End of the Playback
To define whether a playback should loop or switch off at the end, open the Playback Settings by clicking on the Playback Label or pressing Edit followed by the button of the playback. Then, select Settings from the top toolbar.
Playbacks can be set to one of two run modes:
- Loop – When the last cue has finished, the playback will restart from the first cue and continue running indefinitely.
- Release – When all cue times of the last cue have elapsed, the playback will switch off automatically.
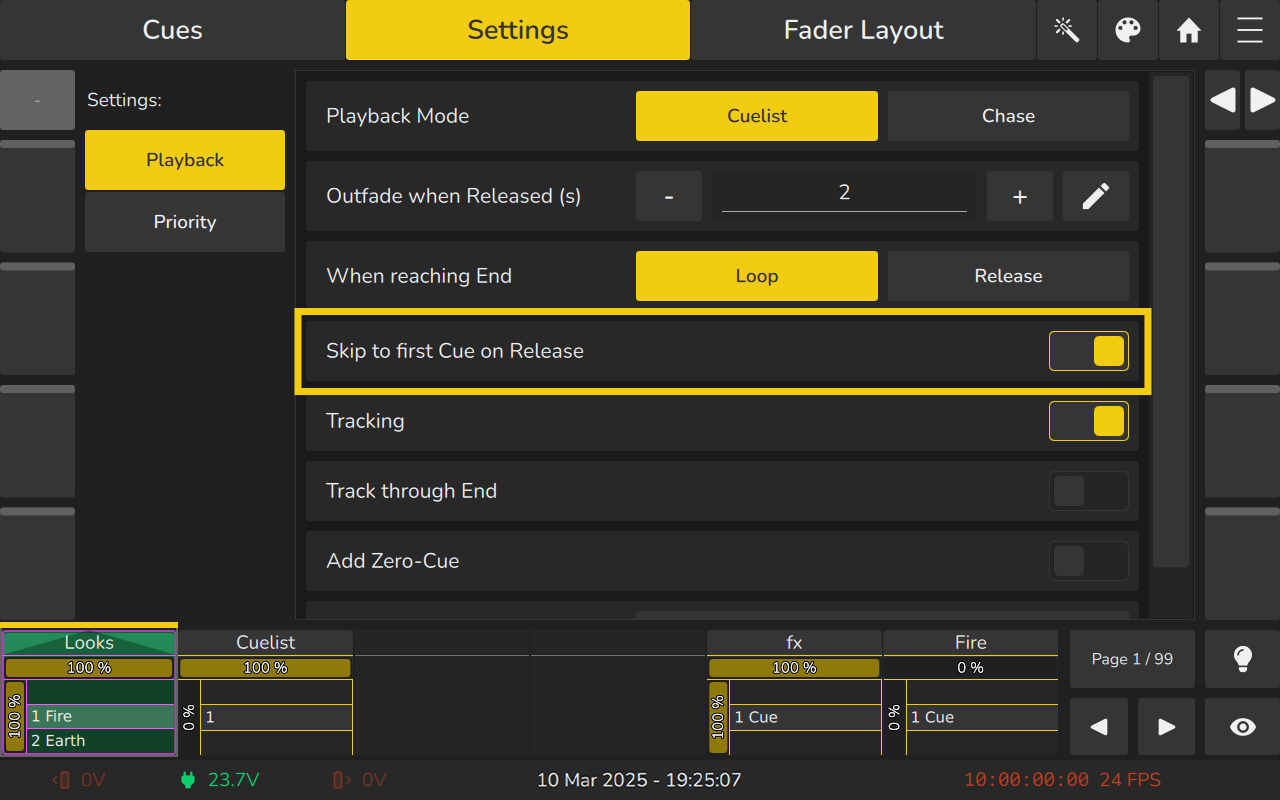
Skip to the first Cue on Release
By default, when a playback is restarted after being released, it resumes from the cue it was in when it was last active.
Enabling Skip to First Cue on Release changes this behavior so that the playback always starts from the first cue when it is activated again.
To enable this option, open the Playback Settings by clicking on the Playback Label or pressing Edit followed by the button of the playback. Then, select Settings from the top toolbar.
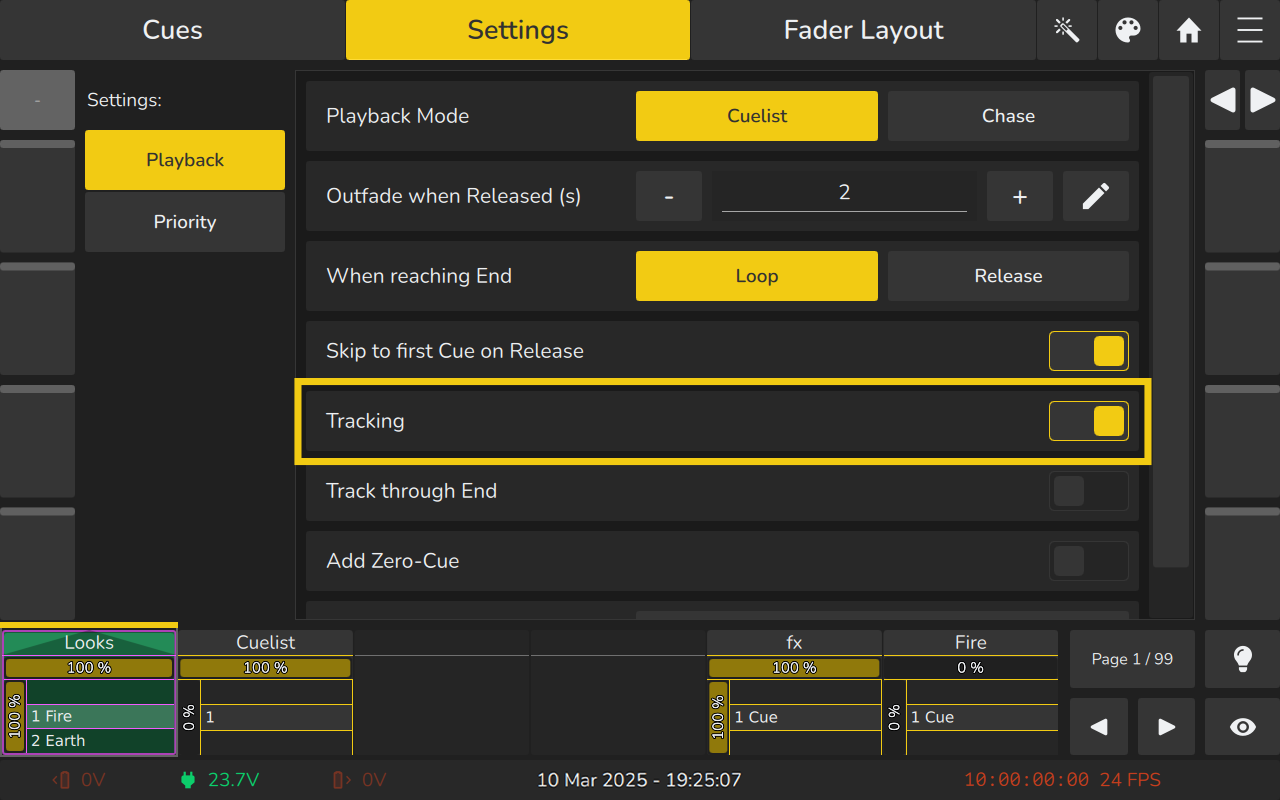
Enabling or disabling Tracking
By default, playbacks use Tracking, meaning that active values from previous cues will continue into the following cues unless they are explicitly changed. This allows for smooth transitions and reduces the need to reprogram unchanged parameters in each cue.
If Tracking is disabled, each cue will only contain the values explicitly recorded in it, and any values not included will return to their previous state or default.
To enable or disable Tracking, open the Playback Settings by clicking on the Playback Label or pressing Edit followed by the button of the playback. Then, select Settings from the top toolbar.
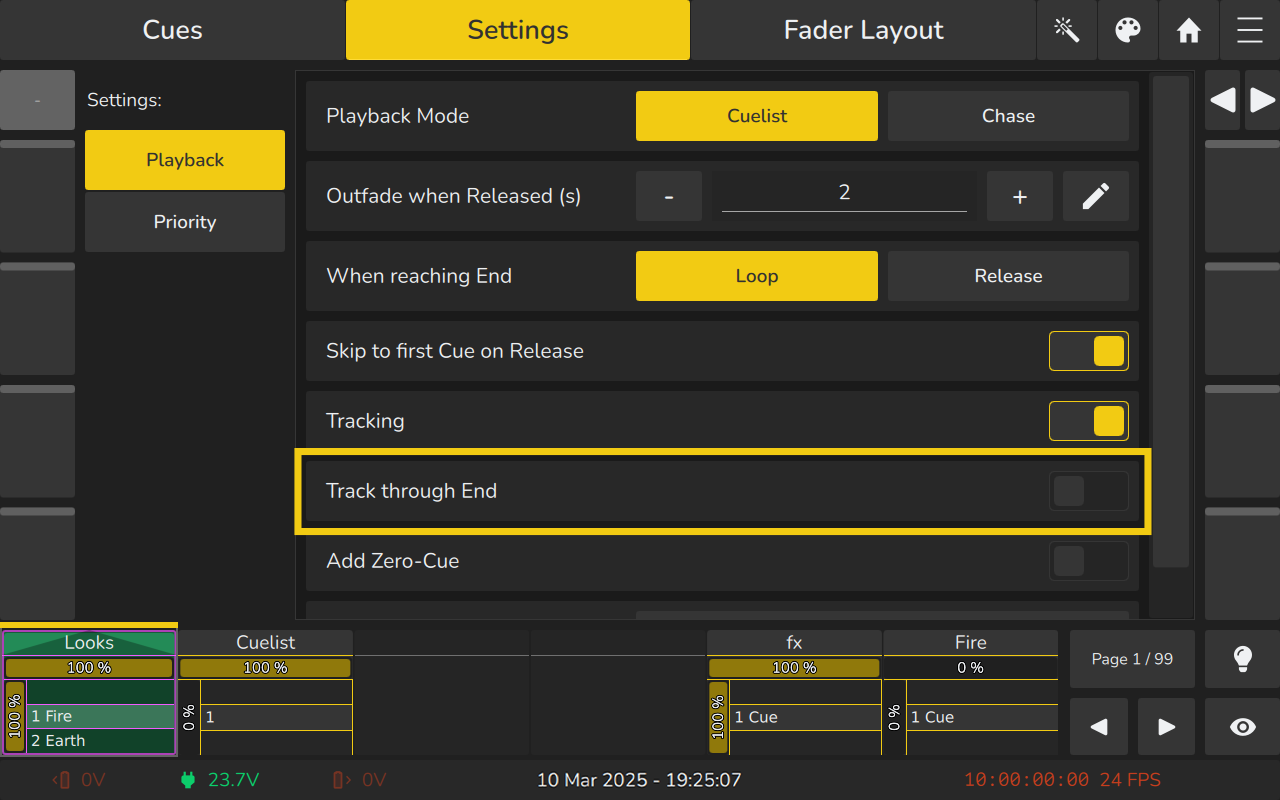
Enabling or disabling Track Throgh End
When Track Through End is enabled, the values from the last cue will track into the first cue when the playback loops. This allows for continuous changes, such as when a light stays on while other parameters, like color, alternate between cues.
For example:
- Cue 1: Light 1 turns on, even lights are red, odd lights are blue.
- Cue 2: Light 2 turns on, even lights are blue, odd lights are red.
When the playback loops, the lights will stay on, but the colors will alternate between red and blue.
If Track Through End is disabled, the playback will restart with the values set in the first cue, without carrying over the changes from the last cue.
To enable or disable Track Through End, open the Playback Settings by clicking on the Playback Label or pressing Edit followed by the button of the playback. Then, select Settings from the top toolbar.
Add Zero Cue
When enabled, the Zero Cue will trigger automatically at the start of a cuelist and make sure that all fixtures that do not have dimmer values recorded in the first cue, but are used throughout the cuelist have their intensity set to 0%.
To enable or disable Zero Cue, open the Playback Settings by clicking on the Playback Label or pressing Edit followed by the button of the playback. Then, select Settings from the top toolbar.

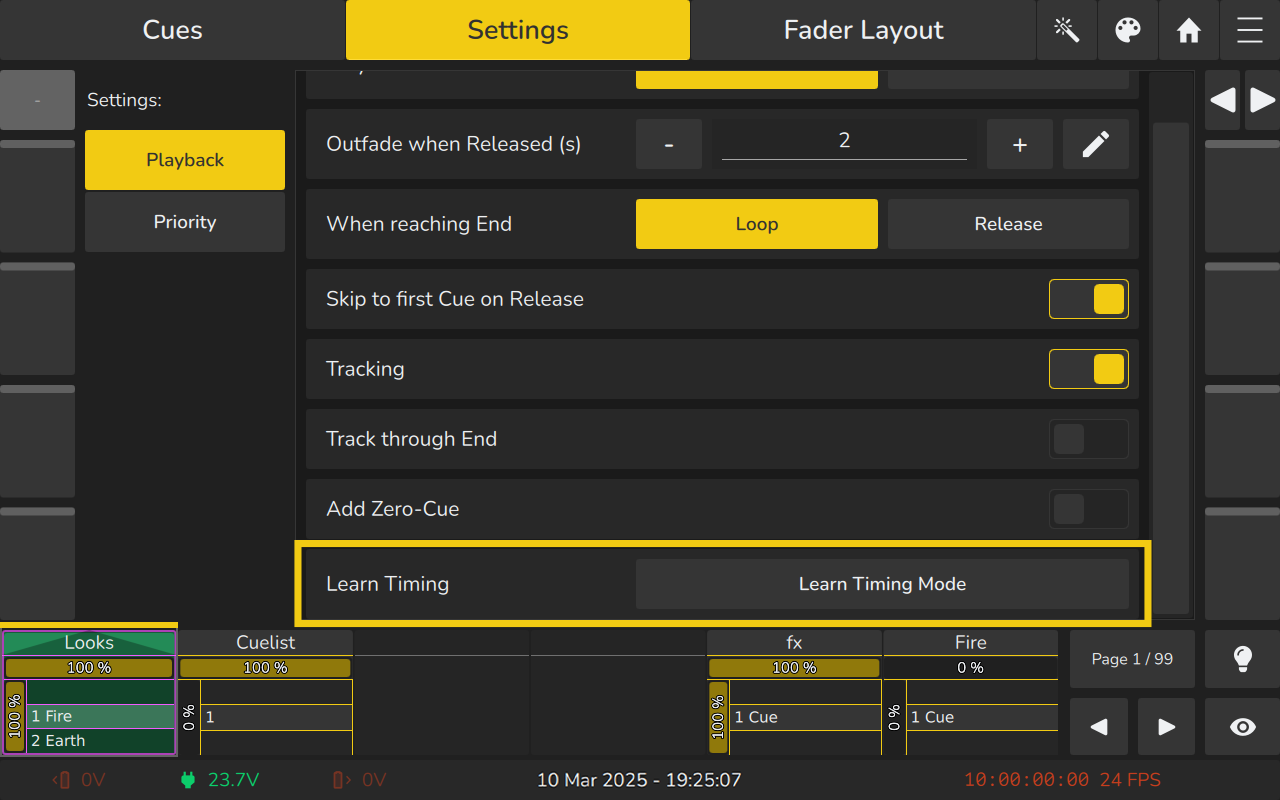
Learn Timing
The Learn Timing button is useful for capturing the timings of cues when working with Wait or Timecode triggers in a cuelist.
To access the Learn Timing function, open the Cuelist Settings by clicking on the Cuelist Label or pressing Edit followed by the button of the cuelist. Then, select Learn Timing from the available options.
When the cuelist is in Learn Timing Mode, the current cue's color will be indicated with a magenta background. Each press of the Go button will cause the cuelist to record the time elapsed between the start of the current cue and the activation of the Go button. This elapsed time is then added to the Trig Time field for the next cue.
If cue triggers are set to Timecode, pressing the Go button will set the cue's time to the Timecode value received at the moment of the press.
This feature simplifies the process of automatically capturing timings for cues based on real-time actions or external timecode inputs.
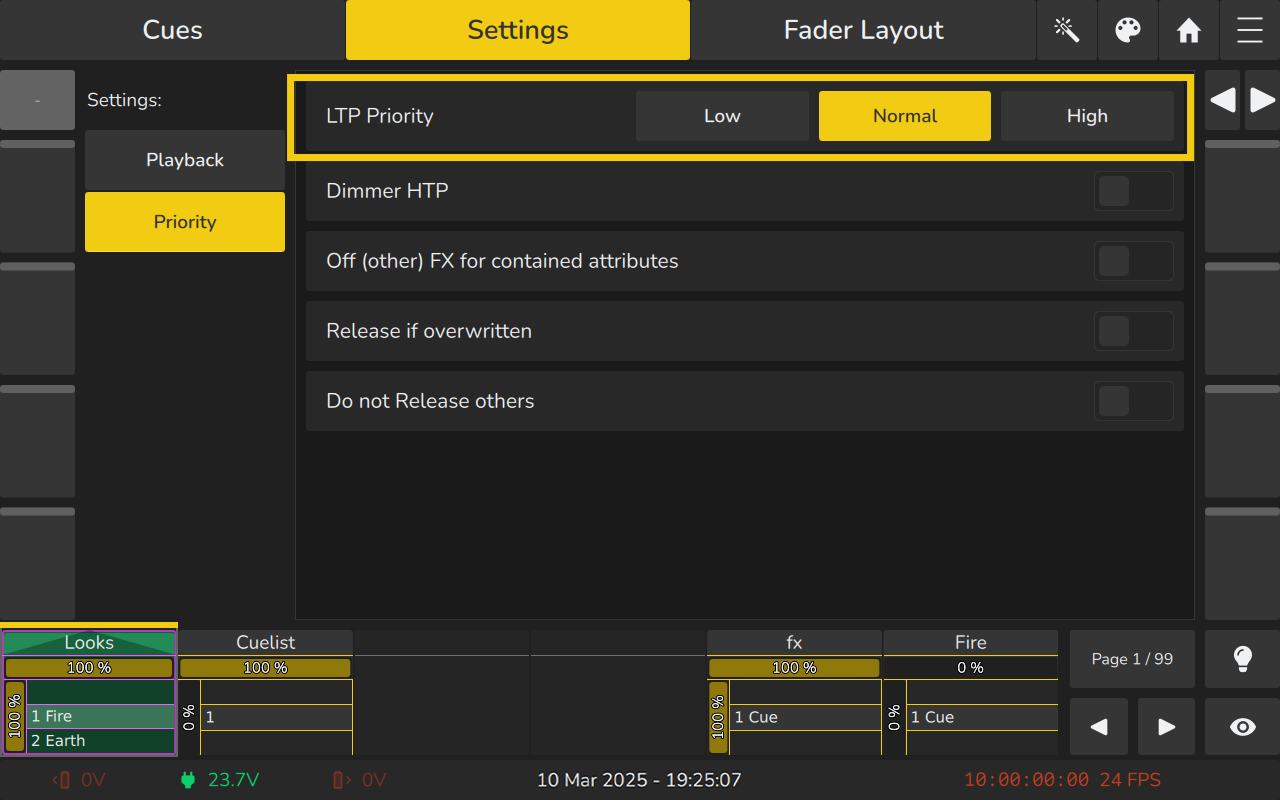
7.4.2 Priority Settings
Priority Settings allow you to manage how playbacks and cues interact with one another when multiple actions are triggered simultaneously. By adjusting the priority of different elements, you can control which playbacks override others and how conflicts between cues are handled.
To access Priority Settings, open the Playback Settings by clicking on the Playback Label or pressing Edit followed by the button of the playback. Then, select Settings from the top toolbar, and navigate to the Priority Settings section.
LTP Priority
The LTP (Latest Takes Precedence) priority settings for playbacks determine how conflicting control over a fixture's attributes is handled when multiple playbacks are triggered simultaneously. These settings control which playback has priority in determining the final output, with the options being Low, Normal, and High. By default, all fixture functions are compared by the LTP principle.
To configure the LTP priority for a playback, open the Playback Settings by clicking on the Playback Label or pressing Edit followed by the button of the playback. Then, select Settings from the top toolbar and adjust the LTP priority from within the Priority tab.
LTP Priority Levels:
- Low Priority:
A playback set to Low priority will be overridden by playbacks with Normal or High priority. Use this setting when you want a playback to have the least influence over fixture output and be easily overridden by others. - Normal Priority:
A playback set to Normal priority will be overridden only by playbacks with High priority. This setting is ideal for standard playbacks that should generally take precedence but still allow for higher-priority cues or playbacks to override them. - High Priority:
A playback set to High priority will override any playbacks set to Low or Normal priority, regardless of when they are triggered. This setting is typically used for crucial cues or playbacks that must take priority, such as emergency lighting or important effect sequences.
How to Use LTP Priorities:
- Access the Playback Settings by clicking on the Playback Label or pressing Edit followed by the button of the playback.
- Select Settings from the top toolbar.
- On the left-hand side, select Priority.
- Navigate to the LTP Priority setting and choose between Low, Normal, or High.
- Adjust priorities to ensure that critical playbacks have the necessary control, while less important playbacks can be overridden if needed.
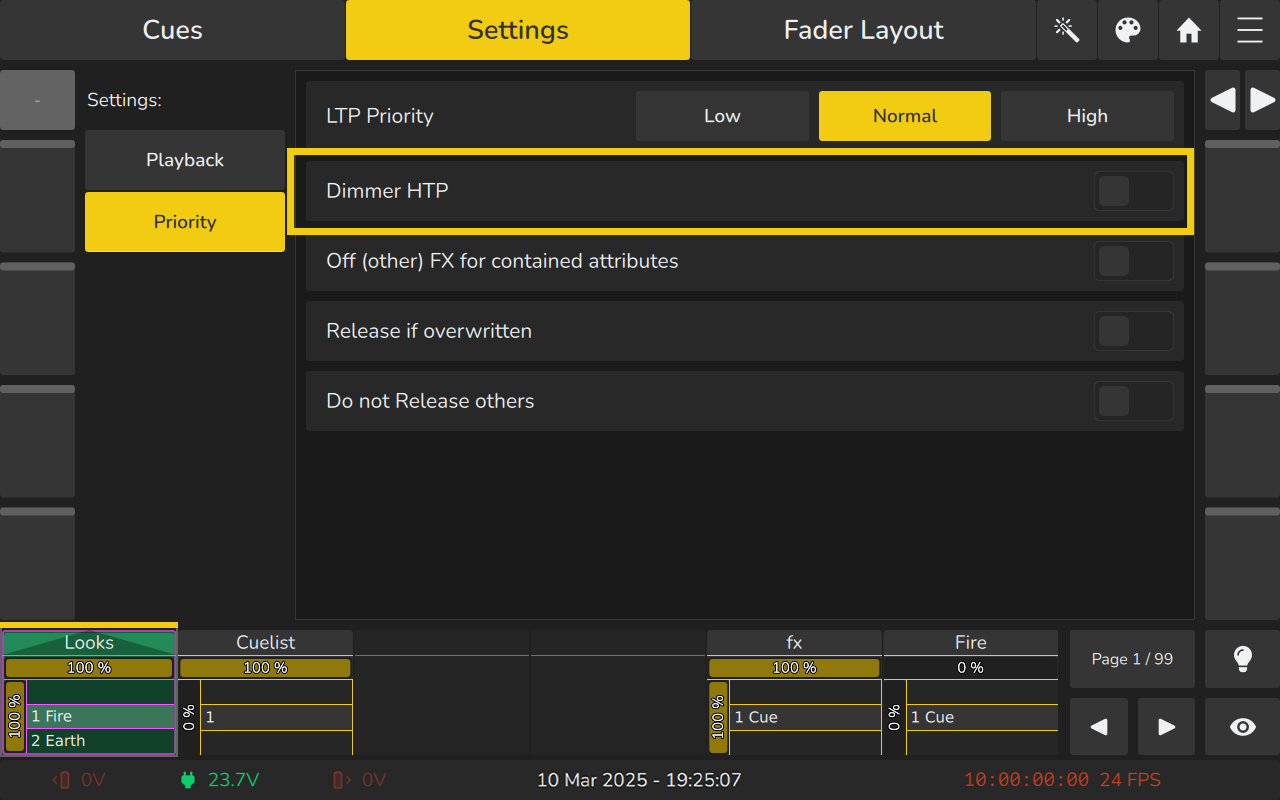
Dimmer HTP
The Dimmer HTP (Highest Takes Precedence) setting ensures that dimmer values are compared using the HTP method, rather than the default LTP (Latest Takes Precedence) method. When enabled, this setting prioritizes the highest dimmer value for each fixture, ensuring that the brightest value takes precedence, even if a lower dimmer value is set in another playback.
This setting is useful when you want the brightest lighting output from multiple playbacks, regardless of the order in which they are triggered.
How to Access and Enable the Dimmer HTP Setting:
- Access the Playback Settings by clicking on the Playback Label or pressing Edit followed by the button of the playback.
- Select Settings from the top toolbar.
- On the left-hand side, select Priority.
- Enable Dimmer HTP to compare dimmer values based on the highest value instead of the latest.
Benefits of Dimmer HTP:
- Prioritize Brightness: Ensures the highest dimmer value is always used, preventing unwanted dimming when multiple playbacks are controlling the same fixture.
- Better Control: Useful for scenarios where you want the brightest light output, such as with multiple effects or cues involving dimming.
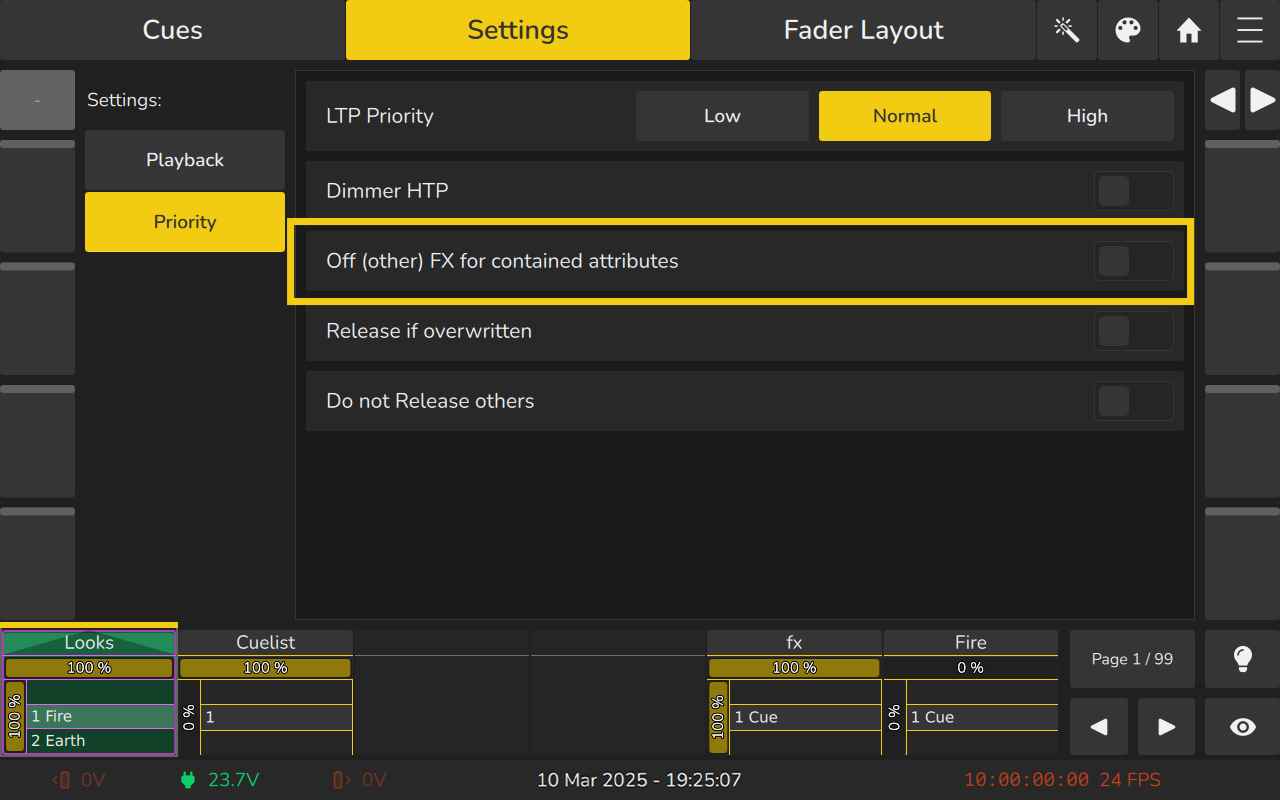
Off (other) FX for contained attributes
When the Off (Other) FX for Contained Attributes setting is turned on, any effects played back by other playbacks or scenes will be automatically stopped for the attributes stored in the current playback when it is triggered. This ensures that the current playback is prioritized and other conflicting effects are deactivated for the same attributes.
How to Enable/Disable:
- Access the Playback Settings by clicking on the Playback Label or pressing Edit followed by the button of the playback.
- Select Settings from the top toolbar.
- In the Priority tab, locate the Off (Other) FX for Contained Attributes option and toggle it on or off.
Benefits:
- Prevent Conflicts: Ensures that only the values in the current playback are active, stopping any conflicting effects from other playbacks or scenes.
- Cleaner Control: Provides better control over how effects are applied, especially when dealing with multiple effects influencing the same fixture attributes.
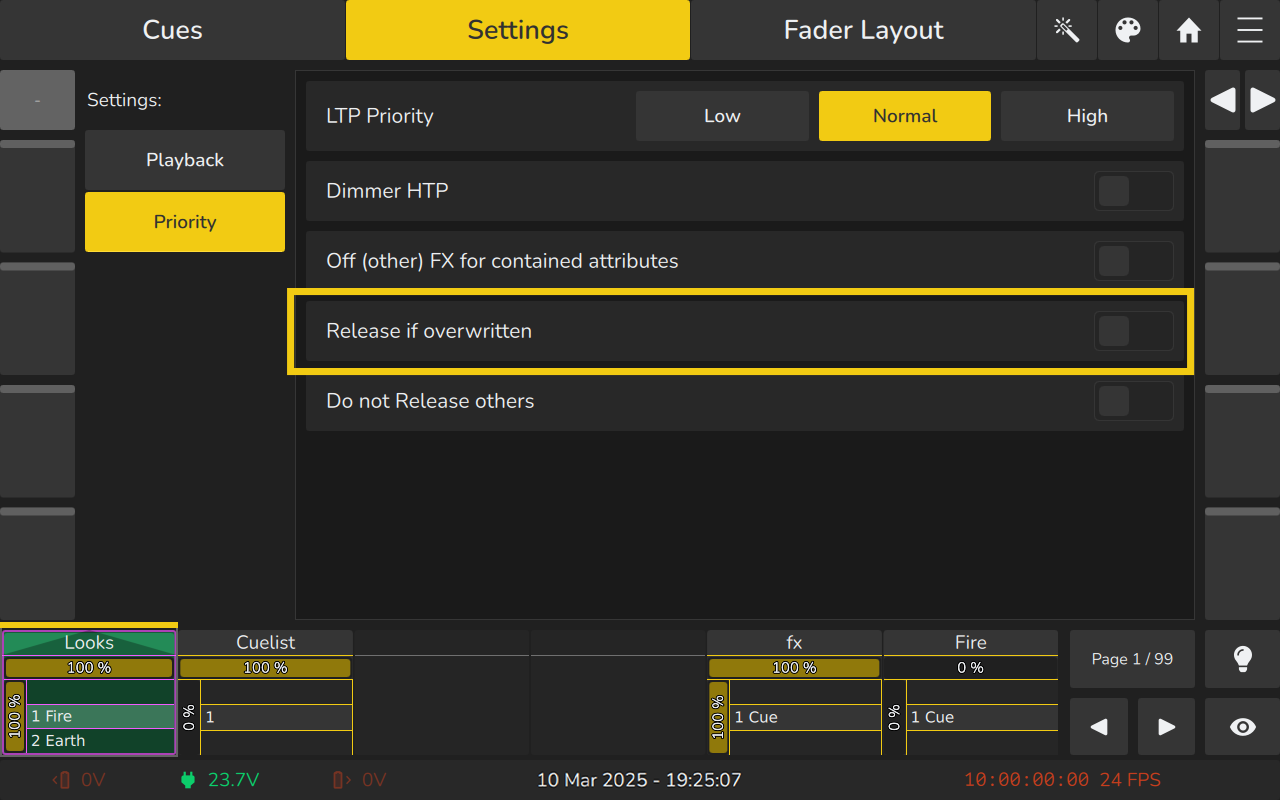
Release if Overwritten
The Release if Overwritten setting ensures that a playback or cue will automatically stop (release) when it is overwritten by another playback or cue. This is particularly useful in situations where you don’t want a playback to continue running when it’s no longer needed, such as when a new playback takes priority or an effect is superseded.
- Access the Playback Settings by clicking on the Playback Label or pressing Edit followed by the button of the playback.
- Select Settings from the top toolbar.
- In the Priority tab, locate the Release if Overwritten option and toggle it on or off.
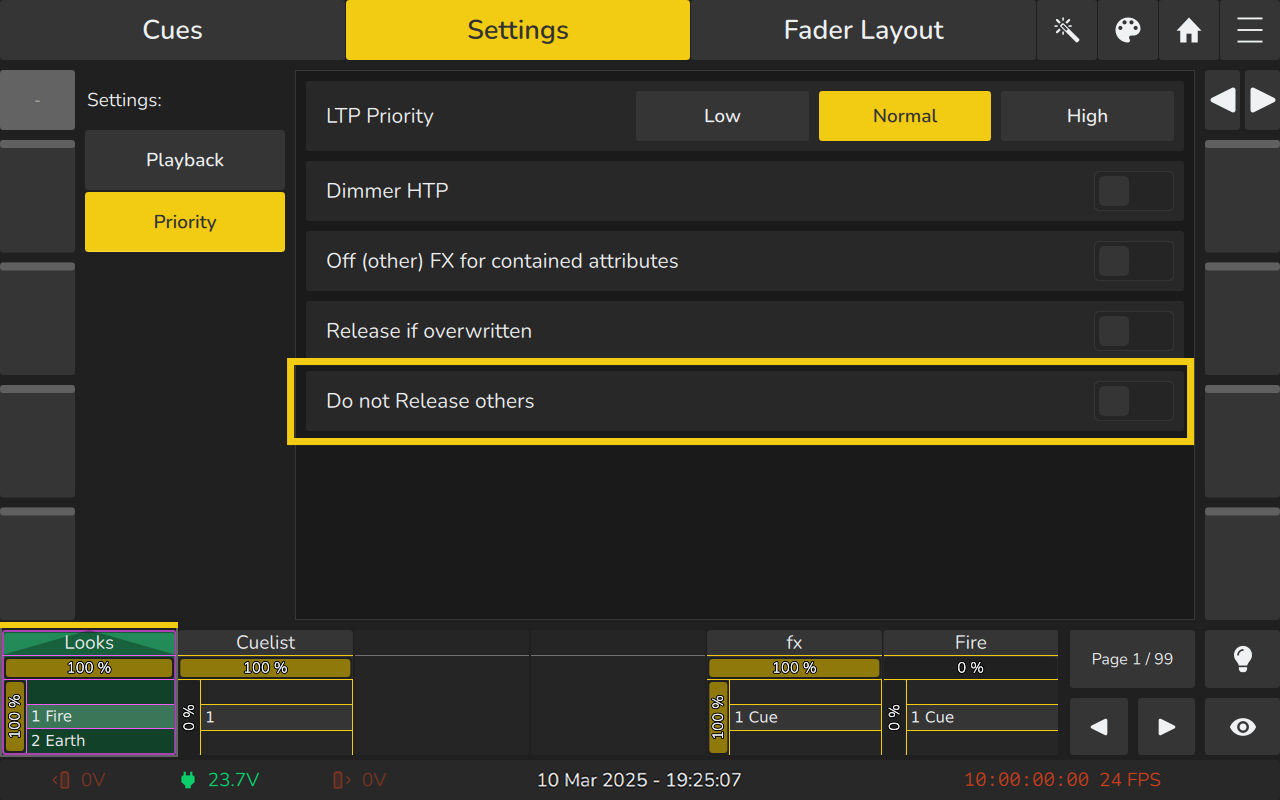
Do not Release others
The Do Not Release Others setting prevents other playbacks from being released, even if they are set to Release if Overwritten, when the current playback overrides their values. When this setting is enabled, the current playback can take priority and override the values of other playbacks, but those other playbacks will continue running and will not be automatically released.
- Access the Playback Settings by clicking on the Playback Label or pressing Edit followed by the button of the playback.
- Select Settings from the top toolbar.
- In the Priority tab, locate the Do Not Release Others option and toggle it on or off.
7.4.3 Chase Options
A Chaser is a type of playback mode where cues are played back in a repeating sequence, creating dynamic lighting effects. Unlike standard cuelists, chasers replace individual cue timings with global fade and snap times, allowing for consistent transitions between steps. The playback speed, crossfade percentage, and step order (e.g., forward, backward, or random) can be customized to achieve different visual effects. Chasers are commonly used for rhythmic lighting effects, such as flashing, pulsing, or color-chasing patterns.
If Chase is selected in the Playback Mode, an additional section with Chase settings will be available on the left-hand side of the settings screen:
When the Playback is set to Chase Mode, the speed and crossfade time can be set using on-screen sliders in the Playback View.
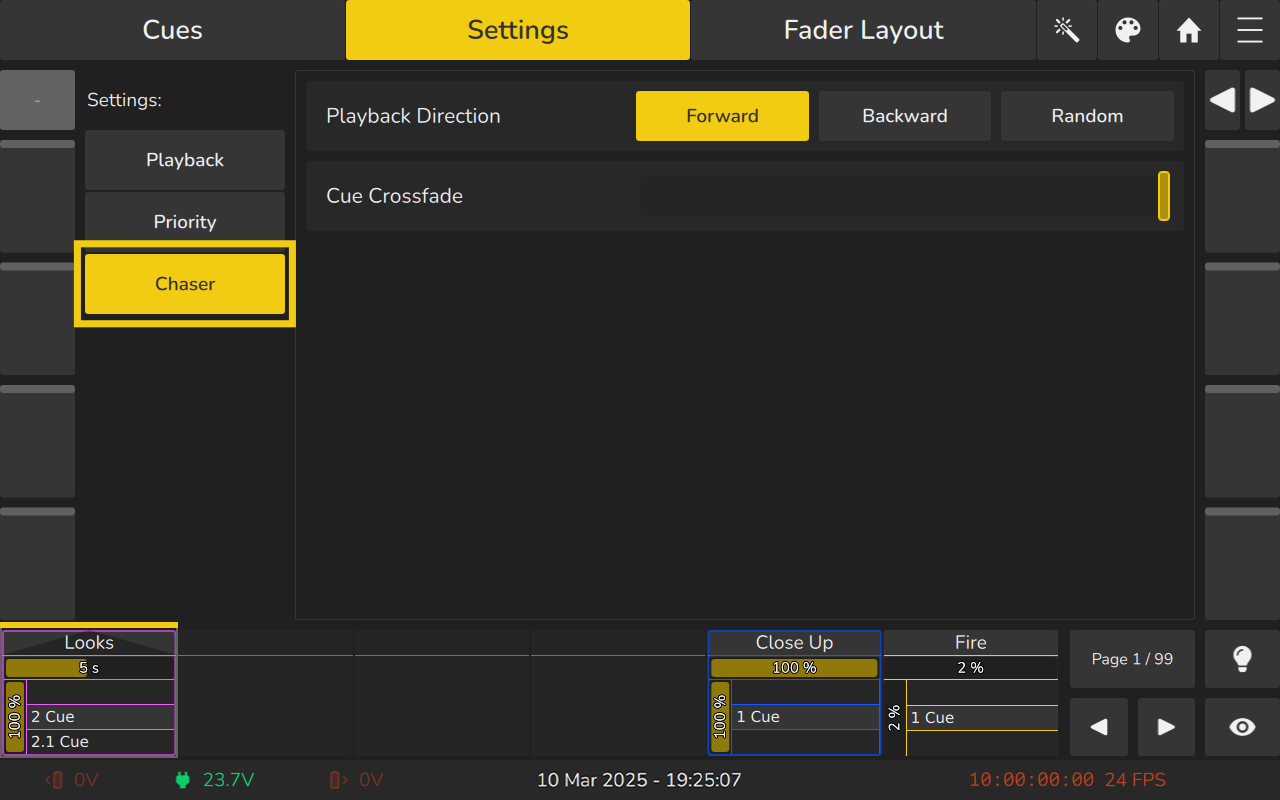
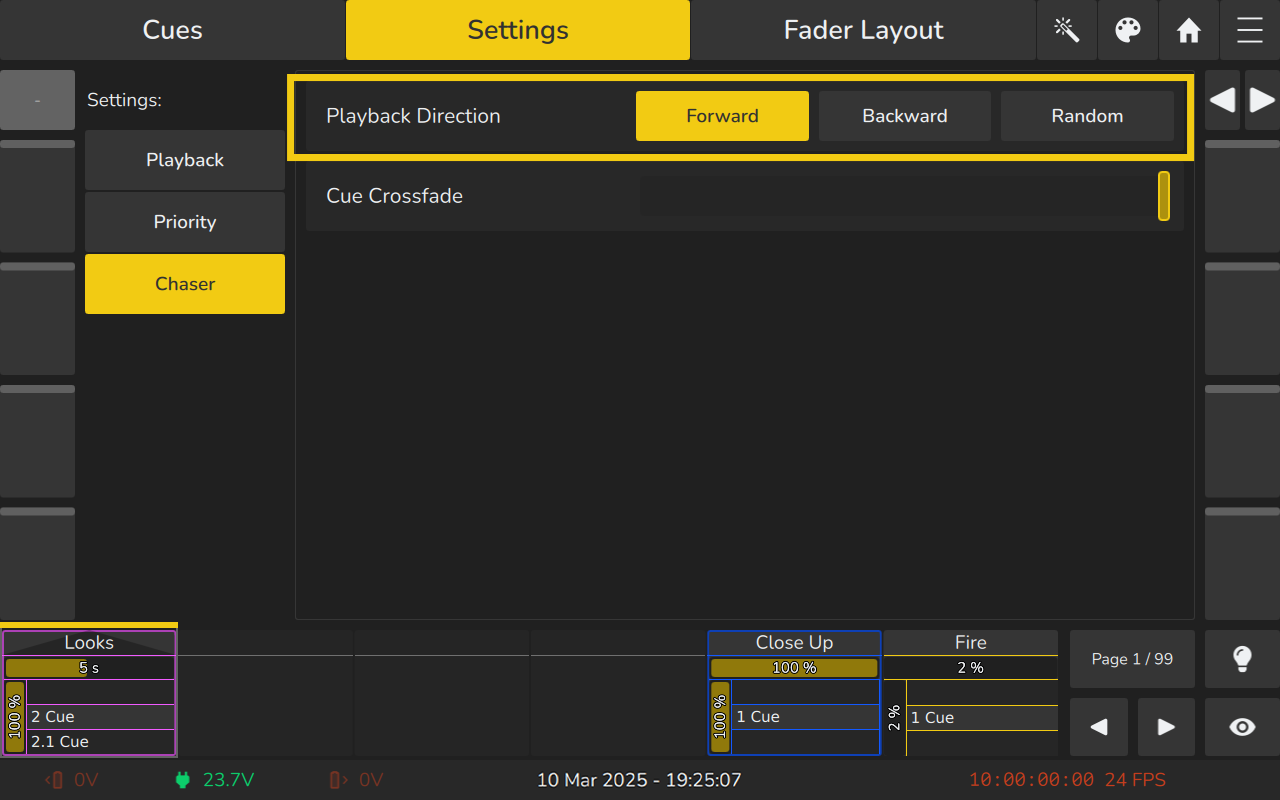
Playback Direction
The Chase Playback Direction defines the order in which the cues in the chase will be played back. You can choose from the following options:
- Forward: The cues will play in their natural order, from the first cue to the last.
- Backward: The cues will play in reverse order, from the last cue back to the first.
- Random: The cues will play in a random order, with no fixed sequence.
How to Set the Playback Order:
- Access the Playback Settings by clicking on the Playback Label or pressing Edit followed by the button of the playback.
- Select Settings from the top toolbar.
- In the Chaser Settings section, located on the left-hand side of the screen, locate the Playback Order option.
- Choose between Forward, Backward, or Random from the available options.
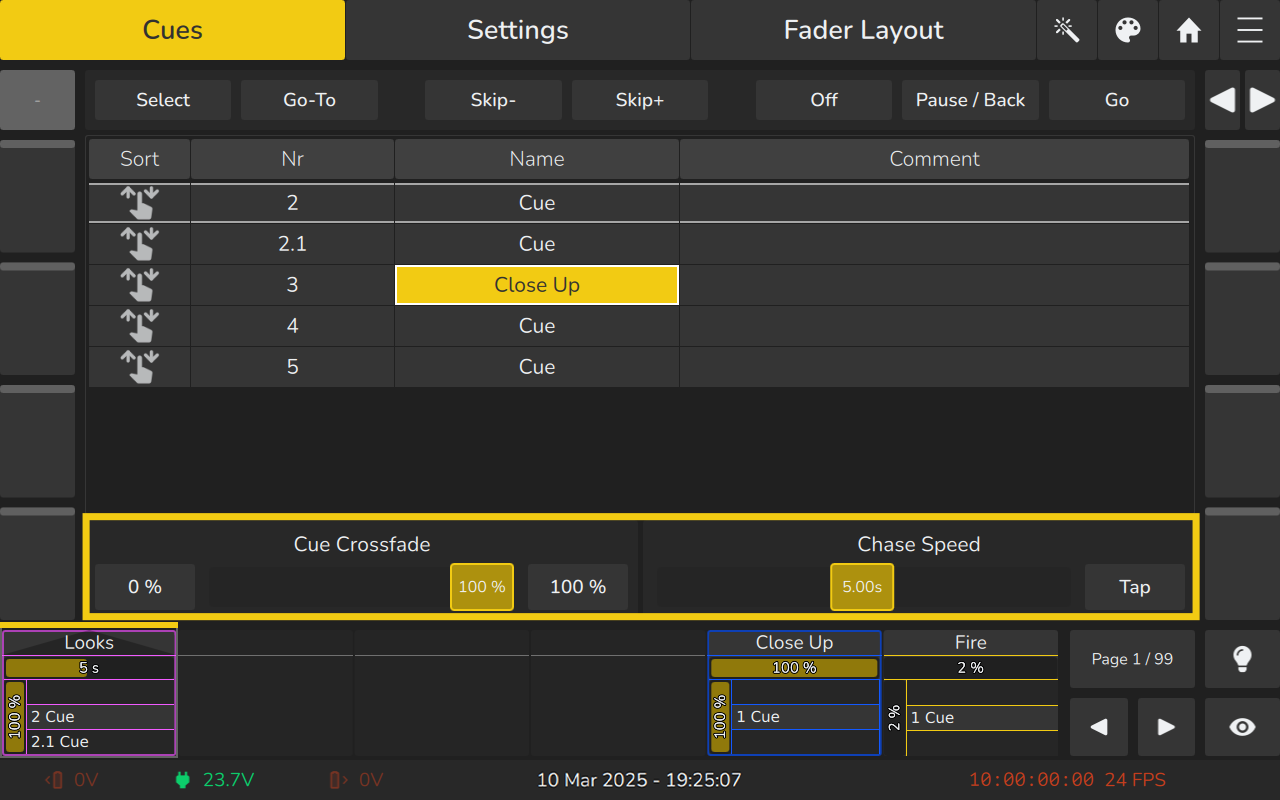
Cue Crossfade
The Cue Crossfade defines the crossfade time between steps in the chase, represented as a percentage. The value you set will control how gradually the transition occurs between each step in the chase:
- 0%: The values will snap instantly from one step to the next, with no fade.
- 100%: The values will gradually fade over the entire duration of the cue, creating a smooth transition.
How to Set the Cue Crossfade:
- Access the Playback Settings by clicking on the Playback Label or pressing Edit followed by the button of the playback.
- Select Settings from the top toolbar.
- In the Chase Settings section, located on the left-hand side of the screen, locate the Cue Crossfade option.
- Adjust the crossfade percentage using the on-screen slider to set the desired fade duration.
Benefits:
- 0%: Provides a sharp, immediate transition between steps for more dynamic and sudden effects.
- 100%: Creates a smooth, seamless fade between cues for a more fluid and gradual effect.
